2. WINDSOR KNOT

This one has an entirely symmetrical form of a triangle.
EASY INSTRUCTION:
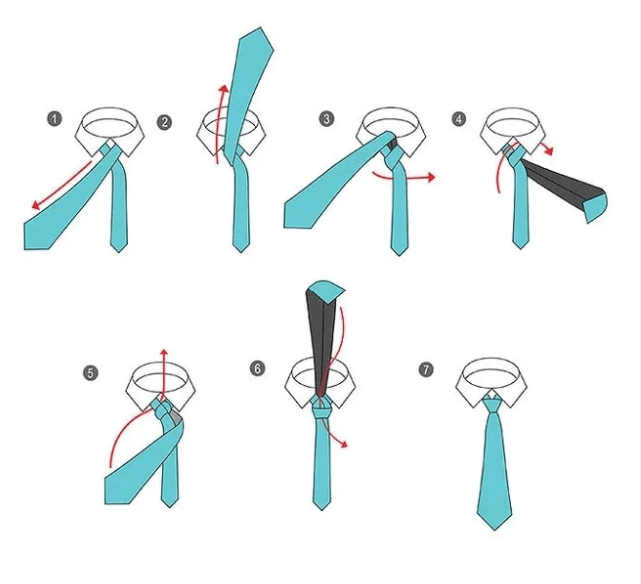
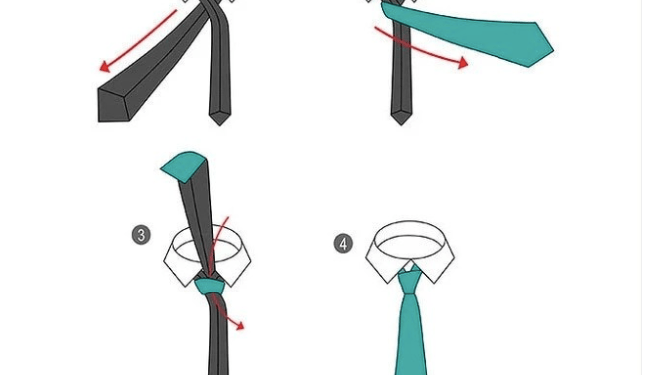
- Place the tie with the seams inside so that the wide part is to the right hand and the narrow is to the left hand. The small end should be slightly pulled above your navel.
- Put the wide end over the narrow one to form a crosshair.
- Pull the wide end to the neck and hanger it over the tie collar.
- After wrapping the tie collar once, pull it to the left.
- Put under the narrow end from left to right.
- Pull the wide end to the neck again and hang it over the formed tie collar.
- Then pull the wide end to the right.
- Make the front side of the tie knot and put the wide side horizontally from right to left.
- Pull the wide end to the neck and hang it under the tie collar.
- Stretch it through the loop on the front side of the tie knot that has formed during the 8th step.
- Pull the wide end down and slightly tighten it.
2. WINDSOR KNOT

This one has an entirely symmetrical form of a triangle.
EASY INSTRUCTION:
- Place the tie with the seams inside so that the wide part is to the right hand and the narrow is to the left hand. The small end should be slightly pulled above your navel.
- Put the wide end over the narrow one to form a crosshair.
- Pull the wide end to the neck and hanger it over the tie collar.
- After wrapping the tie collar once, pull it to the left.
- Put under the narrow end from left to right.
- Pull the wide end to the neck again and hang it over the formed tie collar.
- Then pull the wide end to the right.
- Make the front side of the tie knot and put the wide side horizontally from right to left.
- Pull the wide end to the neck and hang it under the tie collar.
- Stretch it through the loop on the front side of the tie knot that has formed during the 8th step.
- Pull the wide end down and slightly tighten it.
Page 2 of 10


Discussion about this post