You’ve mastered drawing faces and figures. You’ve nailed perspective and shading. Now it’s time to expand your artistic horizons. With so many types of drawing out there, how do you choose where to focus your efforts? Lucky for you, we’ve got the inside scoop on 25 must-try drawing styles for artists looking to shake things up. In this article, we’ll walk you through different types of drawing styles with examples of each unique technique from hyperrealism to cross hatching and everything in between. We’ll also share tips to help you experiment with and master these different styles. So grab your sketchbook, pencil, eraser, and imagination. It’s time to venture outside your artistic comfort zone!
Introduction to Drawing
Drawing is a visual art form in which an artist uses instruments like pencils, pen, and brushes to make marks on a surface like paper or canvas. The marks create lines and shapes to represent images or express an idea.
Drawing allows you to render shapes, forms, and proportions. It helps in developing hand-eye coordination and perception of space. You can capture the likeness of a subject or create imaginative works. Drawing exercises your observational skills and patience.
For artists, drawing is a fundamental skill that underlies most visual art forms. It allows you to plan compositions, sketch ideas, and work out structural or perspectival problems before executing a painting. Drawing helps you see the world differently and fuels creativity. With regular practice, your skills and confidence as an artist will grow.
Types Of Drawing Styles
When you first start drawing, it can be overwhelming to figure out which style you want to focus on. The good news is, you don’t have to stick to just one! Trying different styles is a great way to improve your skills and find what you enjoy.
These are 25 drawing styles you can try:
Perspective drawing

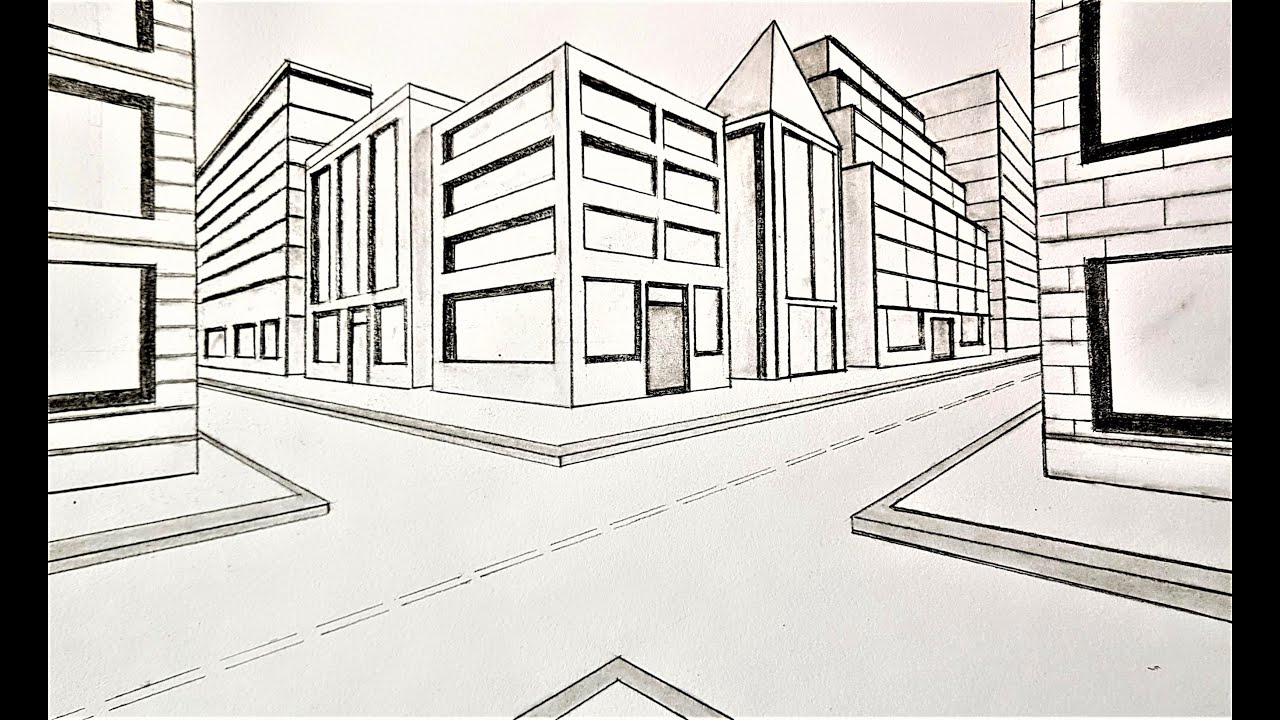
The Perspective drawing is a technique used to represent three-dimensional images on a two-dimensional surface. It gives depth and realism to your drawings. The basic idea behind perspective is that objects appear smaller as they get further away.
There are a few perspective techniques you can use:
One-point perspective
This uses a single vanishing point where parallel lines seem to converge. It’s great for drawing roads, railroad tracks or buildings. Place the vanishing point on the horizon line and have all vertical lines in your drawing remain parallel to the vertical edges of the page.
Two-point perspective
Uses two vanishing points where parallel lines converge. This adds more depth and is ideal for drawing buildings or interior scenes. Place the vanishing points on the horizon line, then construct a cube to determine the angles of the receding lines.
Three-point perspective
Adds even more depth using three vanishing points and is excellent for drawing skyscrapers where you see the top and two sides. The third vanishing point goes above or below the horizon line.
With practice, you’ll be creating mind-bending drawings in no time. Perspective drawing is a skill all artists should work to master.
Pastel drawing
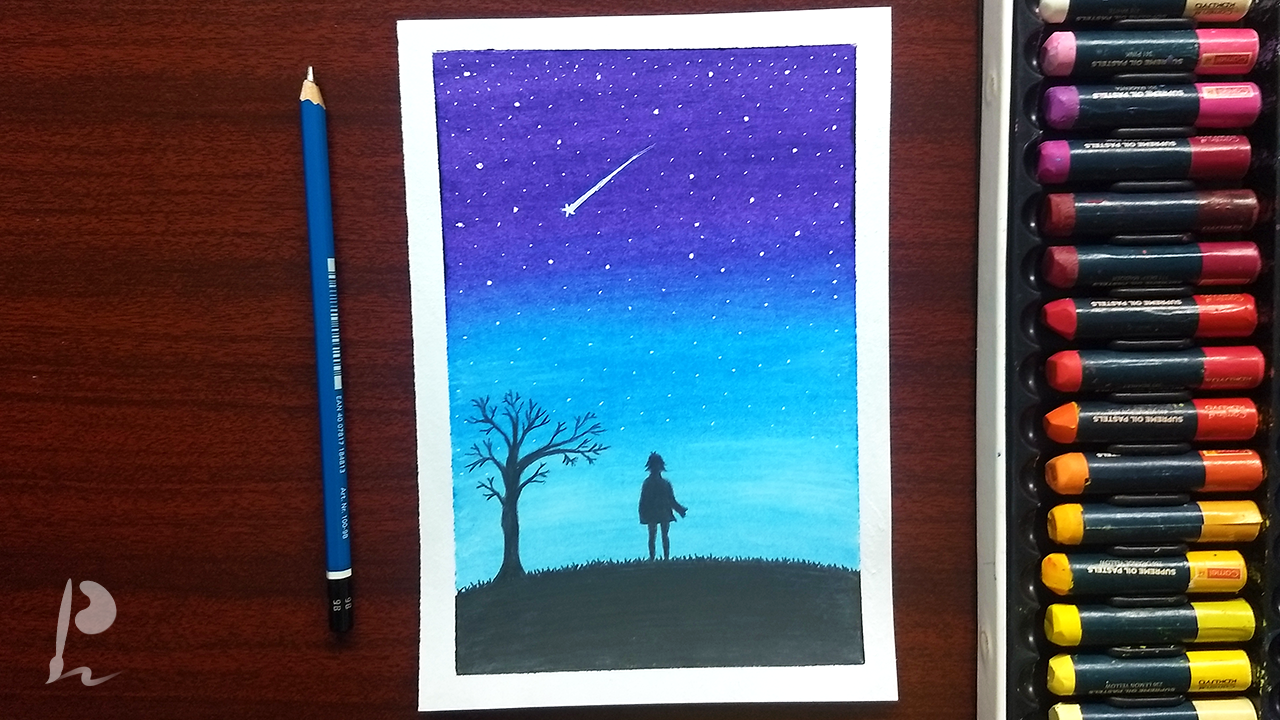
Pastel drawing uses pastel sticks, which are powdery sticks of pigment mixed with a binder. Unlike pencil or charcoal, pastels create marks that have a velvety, chalky texture. To start pastel drawing, you’ll need a set of pastels, a sheet of pastel paper with a slightly rough finish, and a few basic tools like erasers.
To master pastel drawing, you need to understand that it’s all about layers. Unlike pencil or charcoal, pastels can’t be erased. So start light and build up. Apply thin layers of color, blending as you go. Use a kneaded eraser to lift color and make subtle changes.
Pastels come in two types: soft and hard. Soft pastels contain more pigment and give intense color. Hard pastels have a higher wax or oil content, producing a drier, dustier stroke. For the best results, use a combination of soft and hard pastels on a textured surface.
To begin, do a basic sketch of your subject in pencil. Then start applying light layers of color, beginning with hard pastels and progressing to softer ones. Pay attention to shadows and highlights, and capture subtle variations in tone. Blend colors together with your fingers, a chamois, or a color shaper.
Add layers of color and make changes gradually. Step back frequently to view your work from a distance. Keep some hard edges in your drawing for contrast. For the finest details, use a sharp pastel pencil. Seal your finished drawing with a fixative spray to prevent smudging and preserve the colors.
With practice, you’ll get a feel for the medium and learn techniques for achieving different effects. Pastel drawing is a rewarding skill that opens up a whole new range of artistic possibilities.
Landscape drawing

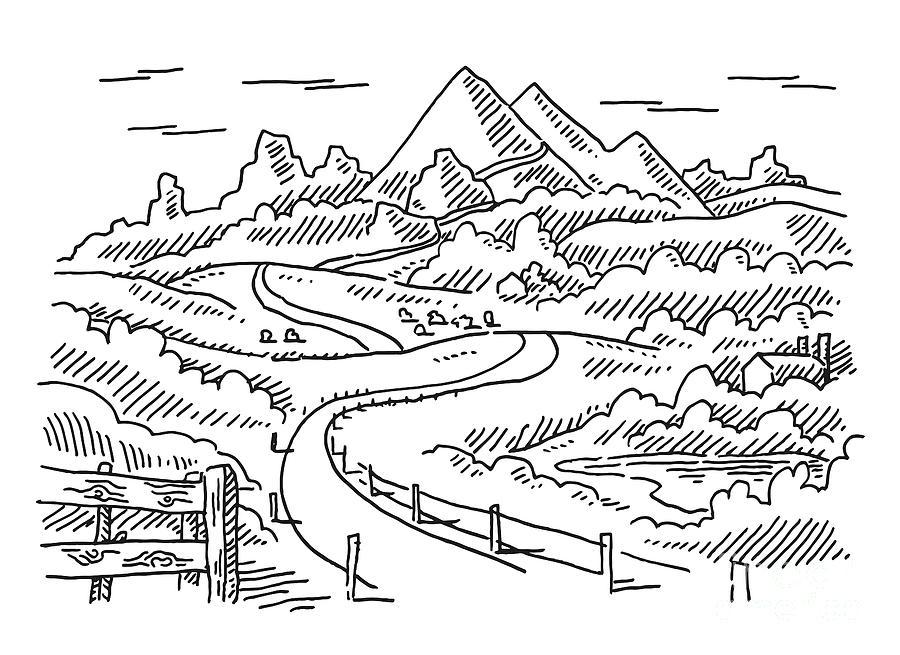
Landscape drawing focuses on the natural outdoor scenery like mountains, trees, rivers or even the open sky. To start, find an inspiring outdoor location and spend some time observing the details. Notice the shapes and forms of the terrain, how the light falls on different surfaces, and try to capture the overall feel of the space.
When you’re ready to draw, start with a rough sketch to determine the basic shapes and layout. Indicate where the horizon line and vanish points are. The horizon line helps establish the eye level and scale of the drawing, while the vanish points show where parallel lines seem to converge in the distance.
Add in the major landscape features like hills, trees and buildings. Use basic shapes like circles, squares and triangles at first. Refine the shapes with shading and highlights to make them look more natural and three-dimensional. Show the texture of grassy fields or rocky terrain with small marks and lines.
To achieve depth, make distant objects smaller and less detailed. Use lighter, more muted colors for faraway features. Add shadows where needed to anchor the various elements in the scene. A successful landscape drawing has a good balance of detail and negative space. Step back frequently to see the overall composition and make sure there is a clear focal point that leads the viewer’s eye through the scene.
With practice, you’ll get better at capturing the subtleties that make a landscape unique. But start with the fundamentals, develop an understanding of perspective and light, and have patience with the process. Landscape drawing, like the natural world, takes time to master.
Graphite drawing

Graphite drawing, also known as pencil drawing, is the art of creating artwork using graphite pencils. Graphite pencils come in a range of softness, from 9H (the hardest) to 9B (the softest). For most graphite drawings, you’ll want a range from HB to 6B.
Softer pencils like 2B to 6B are best for shading and blending. You can create smooth gradients and add depth to your drawing. Harder pencils like HB to 2H are better for fine details and outlines.
To start a graphite drawing, do some light sketches to establish the overall shapes and proportions. Then start refining the details, adding shadow and highlights to create depth and contour. Blend the graphite with a blending stump or chamois to smooth transitions between values.
Use hatching and crosshatching to develop shading. Build up layers of graphite, blending as you go. Add highlights with an eraser to make the image pop. You can also use tools like graphite powder, graphite crayons, and solvents to create interesting effects.
With some practice, graphite drawing can produce art that is rich in detail and visual depth. The wide range of tones and values you can achieve give graphite drawings a photorealistic quality. Graphite is also inexpensive, portable, and erasable, making it a versatile drawing medium for artists of all skill levels.
Gesture drawing

Gesture drawing focuses on capturing the essence of a subject’s pose or movement using loose, expressive lines. As an artist, you’ll sketch the overall shape and form of your subject without emphasizing details. The key is to draw quickly, using flowing, energetic lines to depict the pose and proportions.
To start, give yourself a short time limit, around 30 seconds to 2 minutes. This forces you to draw rapidly without agonizing over the details. Focus on the overall line of action: the spine and major joints like shoulders, hips, knees, and ankles. Capture the angles and proportions between the head, rib cage, pelvis and limbs. Don’t stress about facial features or perfect anatomy. The goal is to convey the feeling and energy of the pose.
With regular practice, gesture drawing helps you gain confidence in your ability to draw any subject on the spot. You’ll get better at simplifying forms and capturing likenesses and movement. Your drawings will become looser, more expressive and dynamic. Even when you move on to longer, more finished pieces, the skills you gain from gesture drawing will be invaluable.
Surrealist drawing

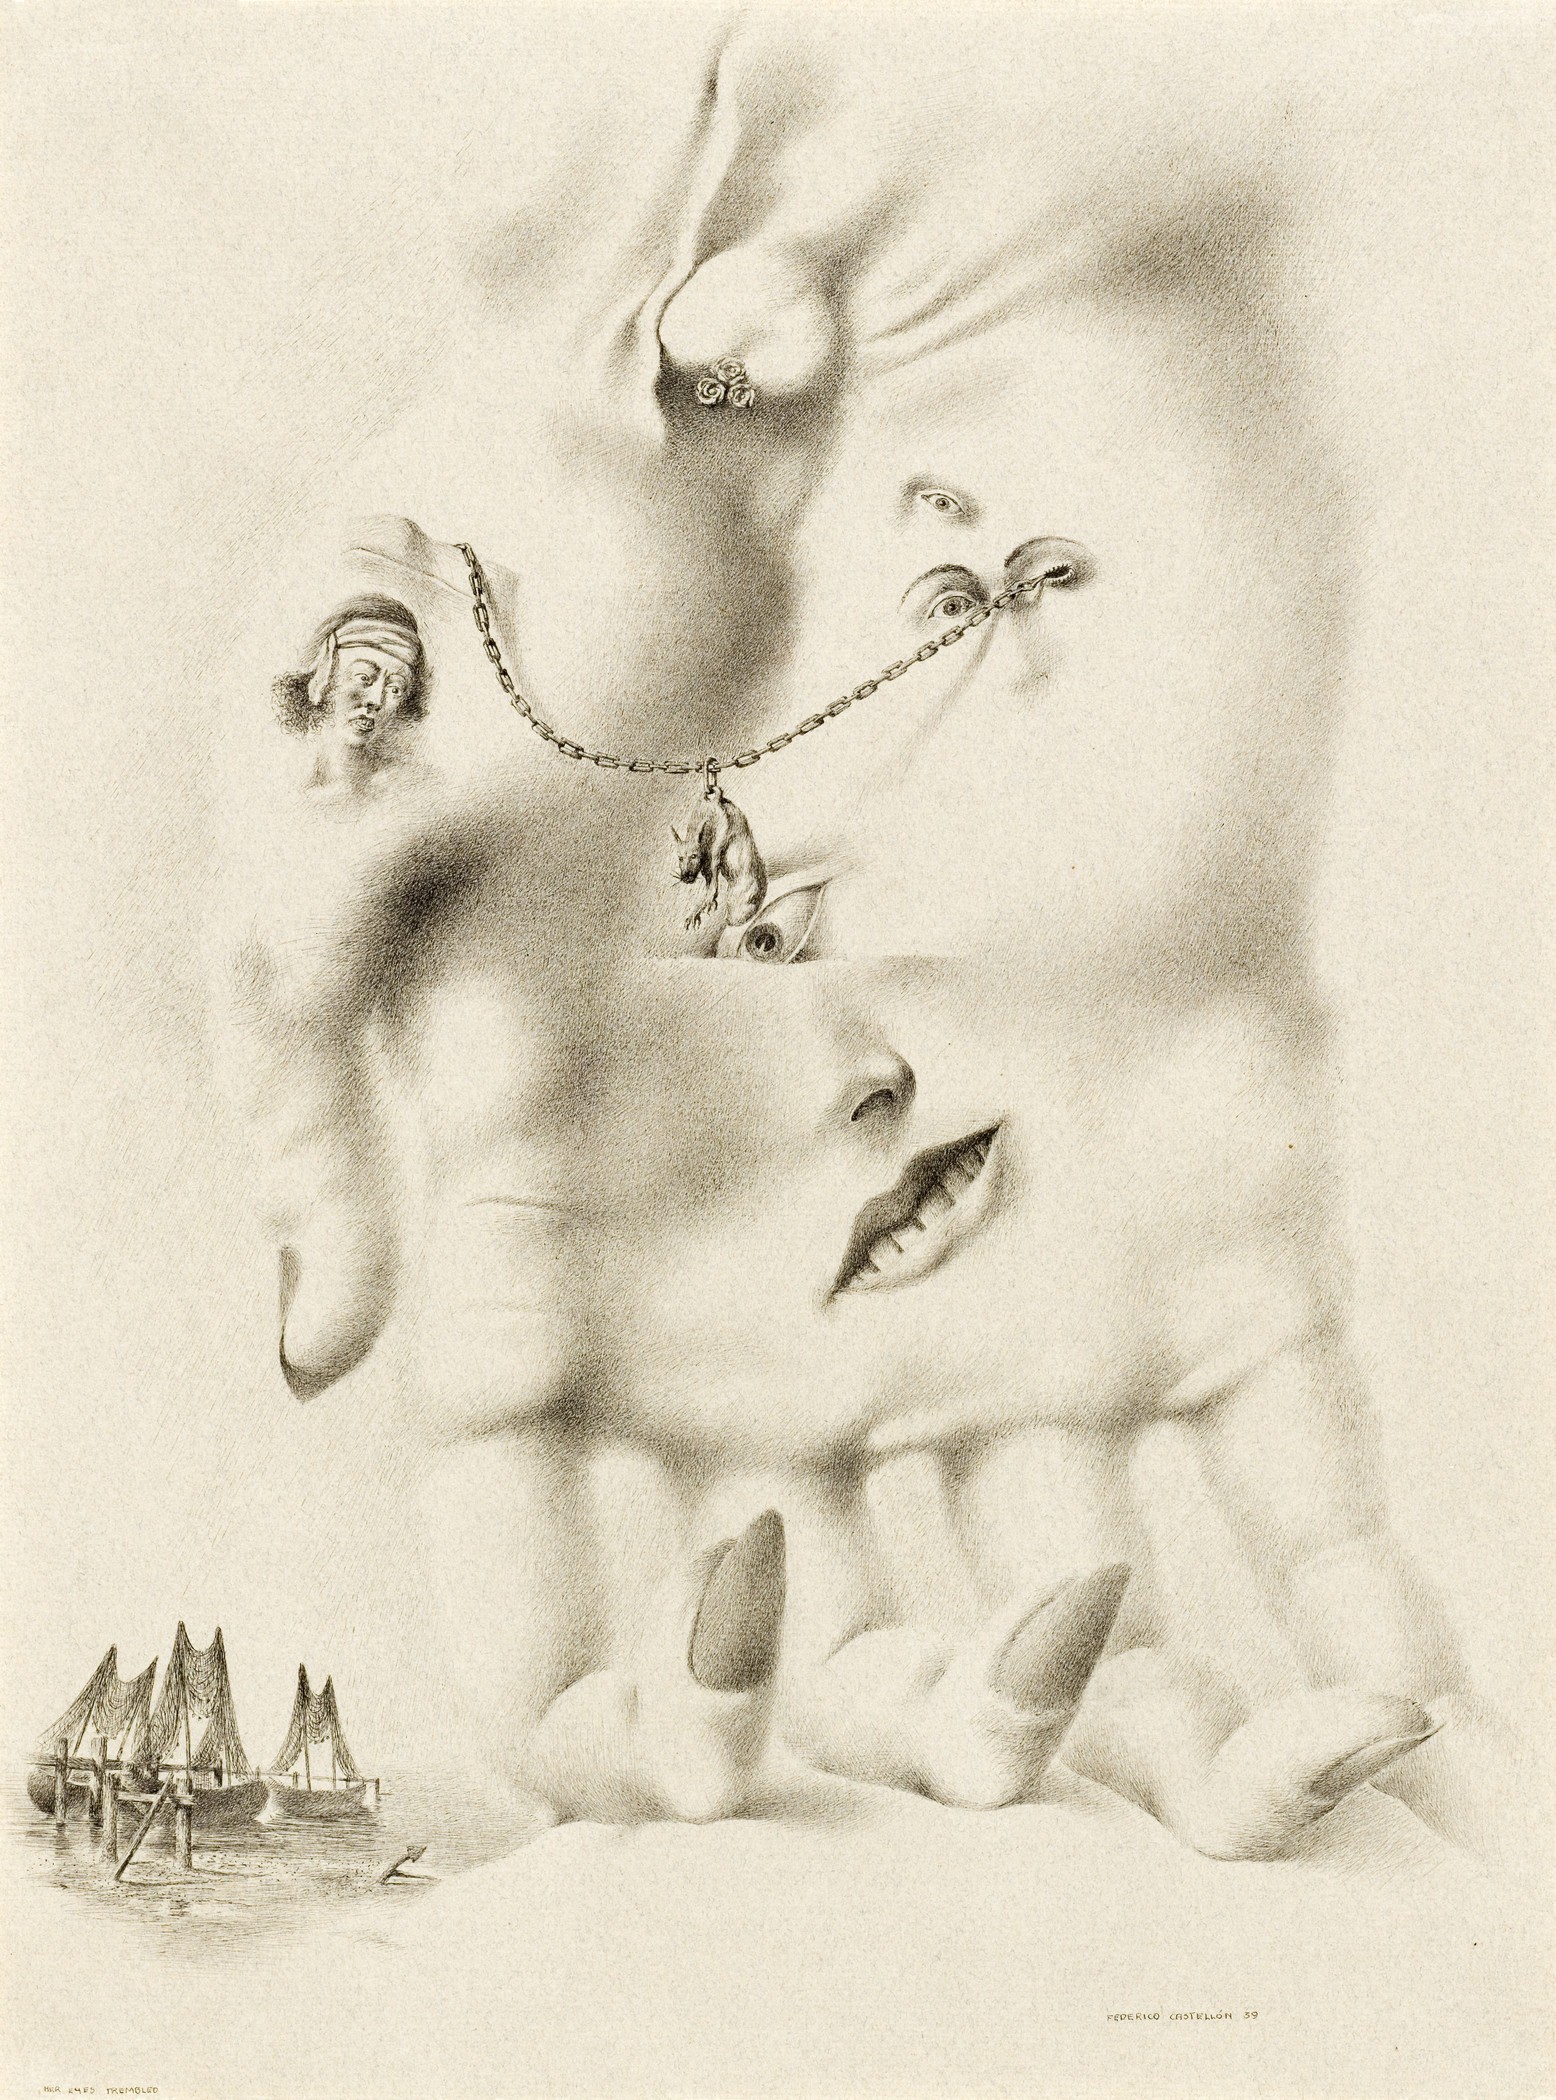
Surrealist drawing aims to depict the workings of the subconscious mind. It focuses on spontaneity and chance. You start with a blank page and a random scribble, then look for forms within the scribble to develop into a drawing.
As you explore the forms, let your imagination guide you. Don’t overthink the process or judge what emerges on the page. The goal is to tap into your subconscious creativity without constraints. Surrealist drawings often have a dreamlike and bizarre quality. Common motifs include distorted figures, objects in strange juxtapositions or scales, and landscapes with an illogical or impossible quality.
Some techniques to try include:
- Automatic drawing: Make spontaneous marks and lines on the page without thinking, then look for shapes and forms to develop.
- Exquisite corpse: Fold a paper into sections and have multiple people draw parts of a figure or scene without seeing the other sections. Unfold to reveal a surreal collaborative creation.
- Frottage: Place paper over a textured surface like wood and rub with a pencil to transfer the pattern. Use the textures as inspiration for a drawing.
- Grattage: Scratch through layers of paint or ink to reveal lines and forms underneath. Continue developing the forms into a full drawing.
Let your imagination run wild and don’t censor yourself. The strangeness of surrealism allows you to tap into the creative potential of your subconscious mind.
Still life drawing

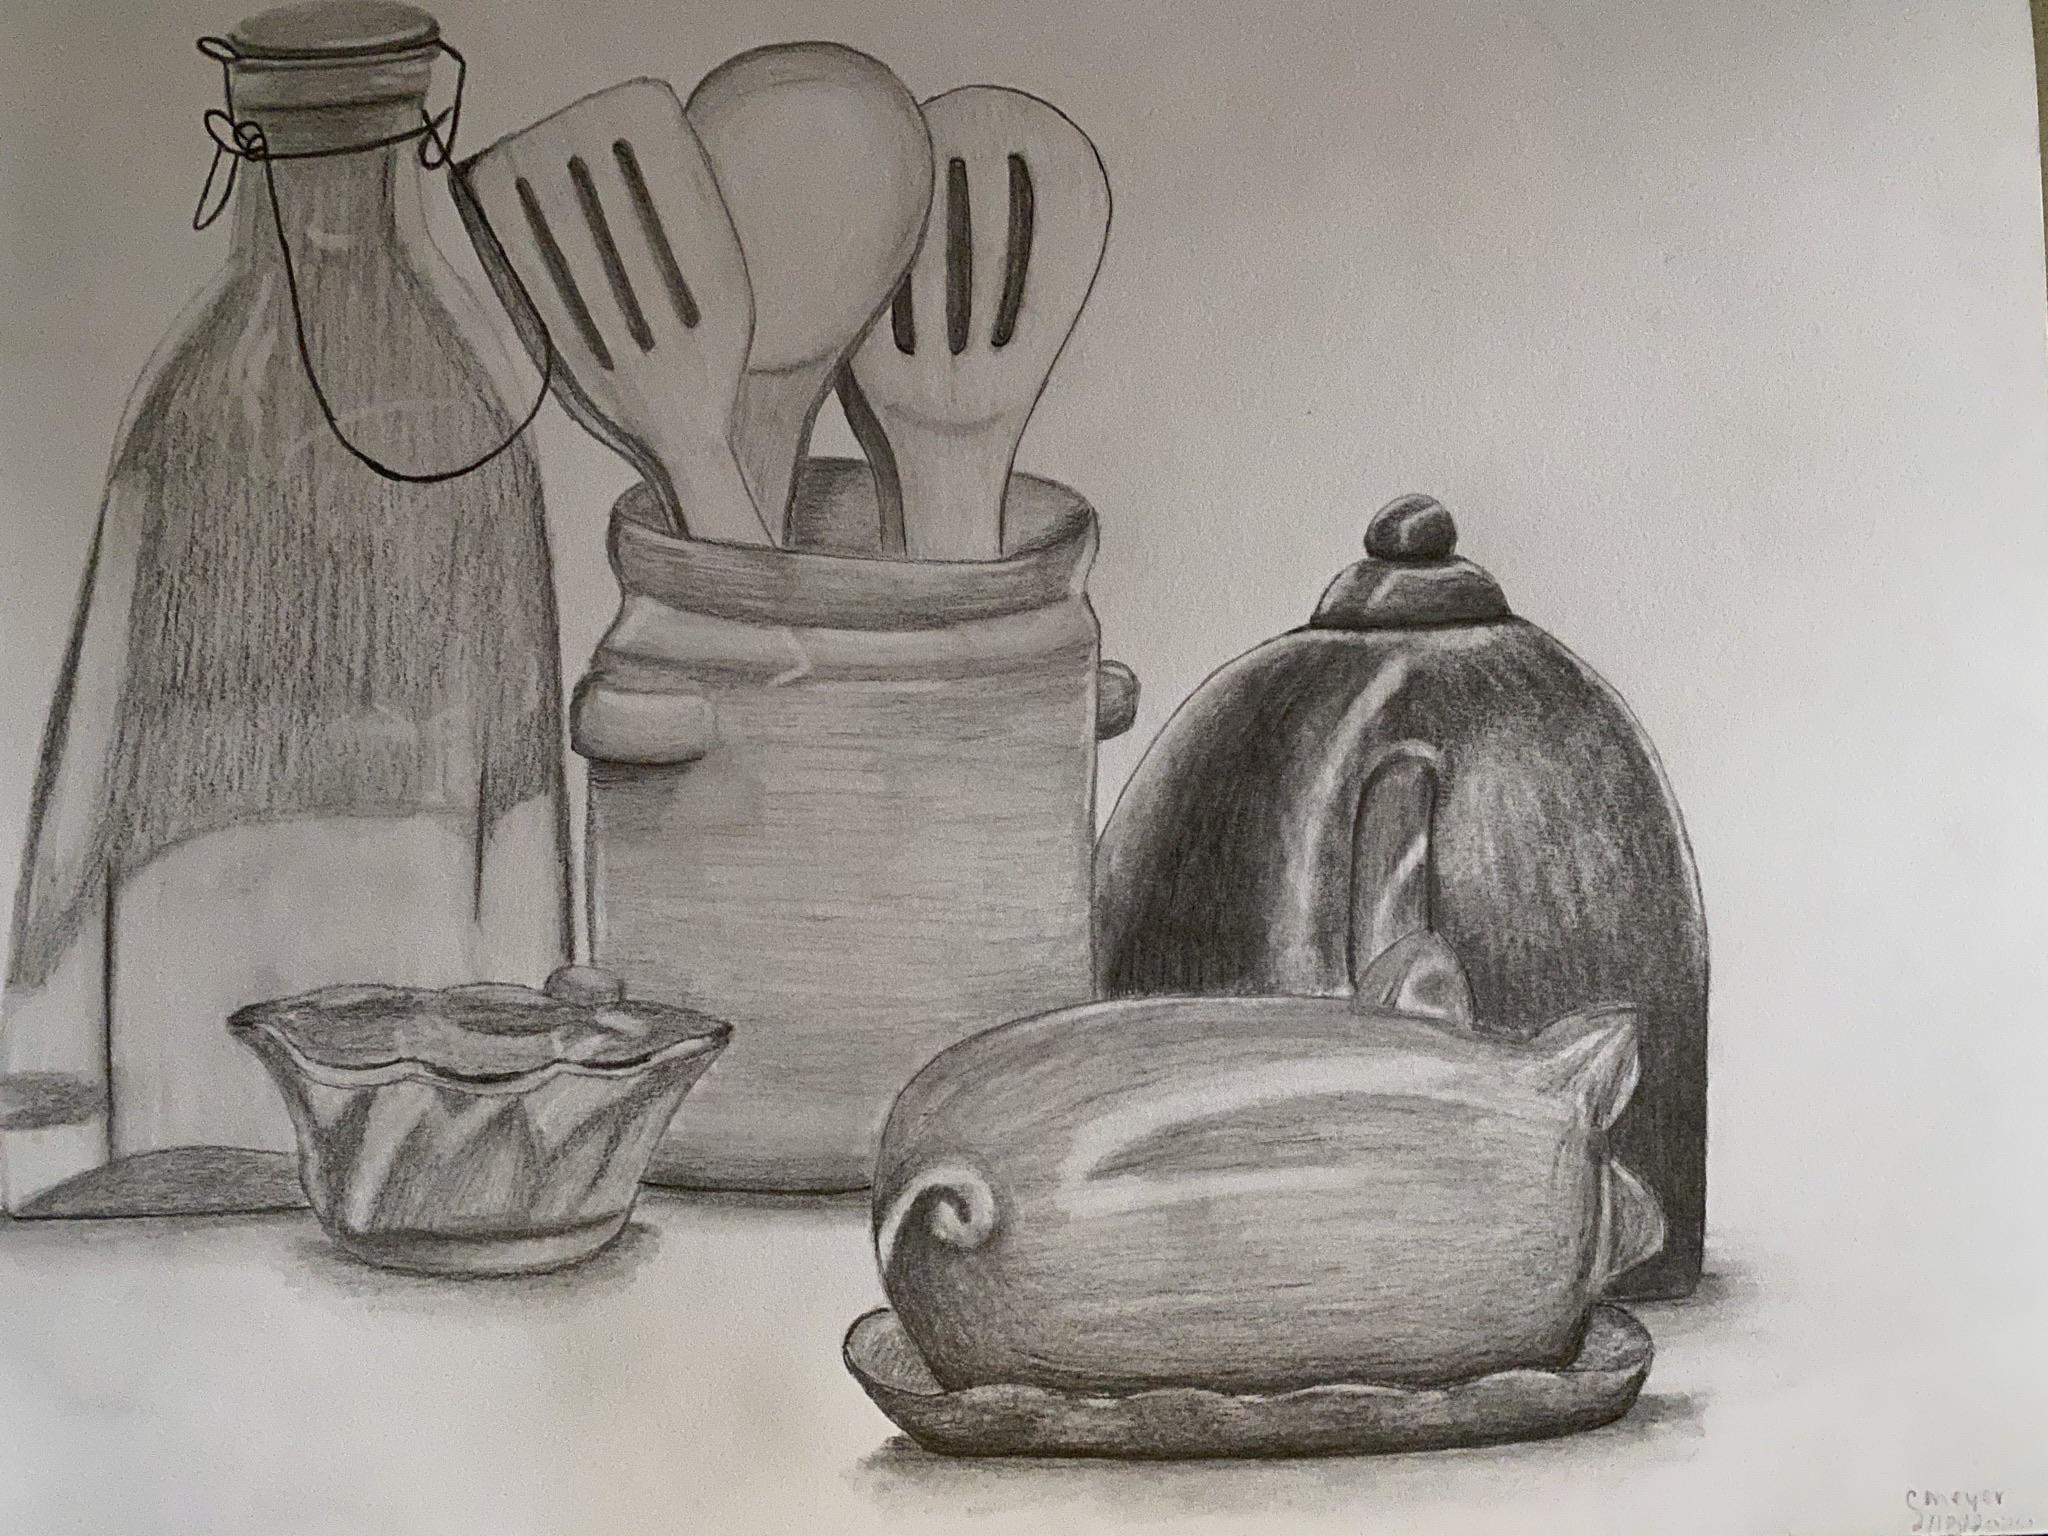
Still life drawing refers to drawing of subjects like flowers, fruits, bowls, vases and other inanimate objects. When doing still life drawing, arrange the objects in a visually interesting composition and observe them closely. Notice the shapes, forms, proportions and contours of the objects. Pay attention to the details that make the objects unique like textures, patterns and reflections.
Capture the essence and likeness of the subjects in your drawing. Start with basic shapes like spheres, cubes, cones and cylinders and build up from there. Look for relationships between the objects like overlapping, proximity and alignment. Sketch the overall contours of the objects lightly before adding details. Consider using hatching, cross hatching and stippling for shading and conveying surface textures.
Still life drawing helps you improve your observation skills and work on fundamentals like perspective, shading and composition. It teaches you to see subjects as a whole as well as focus on the minute details. Still life subjects are perfect for beginners since the objects remain stationary. You can take your time to complete the work without worrying that the subject might move. Still life drawing is a great way to practice and hone your artistic skills.
Technical drawing

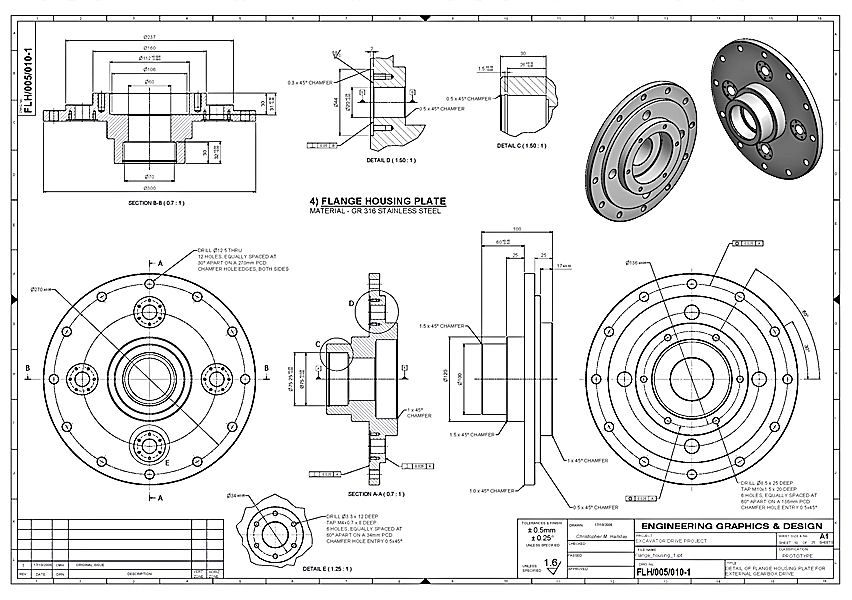
Technical drawing, also known as drafting, is the act of creating accurate representations of objects for technical purposes. Unlike artistic drawing, technical drawings must provide an entirely accurate depiction of the object. They are usually created using drafting tools like T-squares, scales, and protractors.
Technical drawings are used by engineers, architects, and manufacturers to provide detailed specifications for the production and assembly of mechanical components, architecture plans, and other engineering designs. The drawings specify critical dimensions, materials, and processes to ensure the accurate reproduction of a design.
Some common types of technical drawings include:
- Architectural drawings: Used to represent architectural and building designs. Provide floor plans, elevations, sections, and details.
- Mechanical drawings: Provide specifications for mechanical components and assemblies. Include dimensions, materials, and fabrication details.
- Electrical drawings: Provide details on wiring, circuits, and electrical components. Use standard electrical symbols to represent components.
- Civil drawings: Used for civil engineering projects like roads, bridges, dams, and sewer systems. Provide plan, profile, section and detail views.
To create a technical drawing, you’ll need drafting tools, a drafting board or table, and drafting media like paper, mylar or vellum. Pay close attention to line types, scale, dimensioning, and annotations to ensure your drawing can be accurately interpreted. With some practice, you’ll be creating detailed technical drawings in no time!
Cartoon Drawings

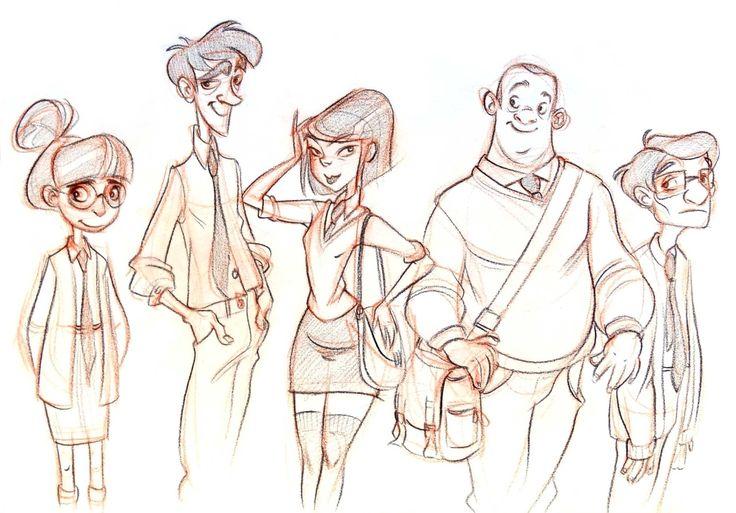
Cartooning is all about exaggeration and simplification. To draw cartoons, start with basic shapes like circles, squares and triangles. Use simple lines and curves to build up the features of your characters. Give them dot eyes, a half-circle smile and minimal details.
Keep your drawings lighthearted and fun. A bit of silliness and absurdity is perfect for cartoons! Let your imagination go wild – animals can talk, inanimate objects come to life, normal rules of physics don’t apply. Anything goes in the wacky world of cartoons!
With some practice, you’ll be creating your own cast of quirky characters and zany comic strips in no time. Cartooning is a fun, freeing style of drawing anyone can enjoy.
Fashion Design
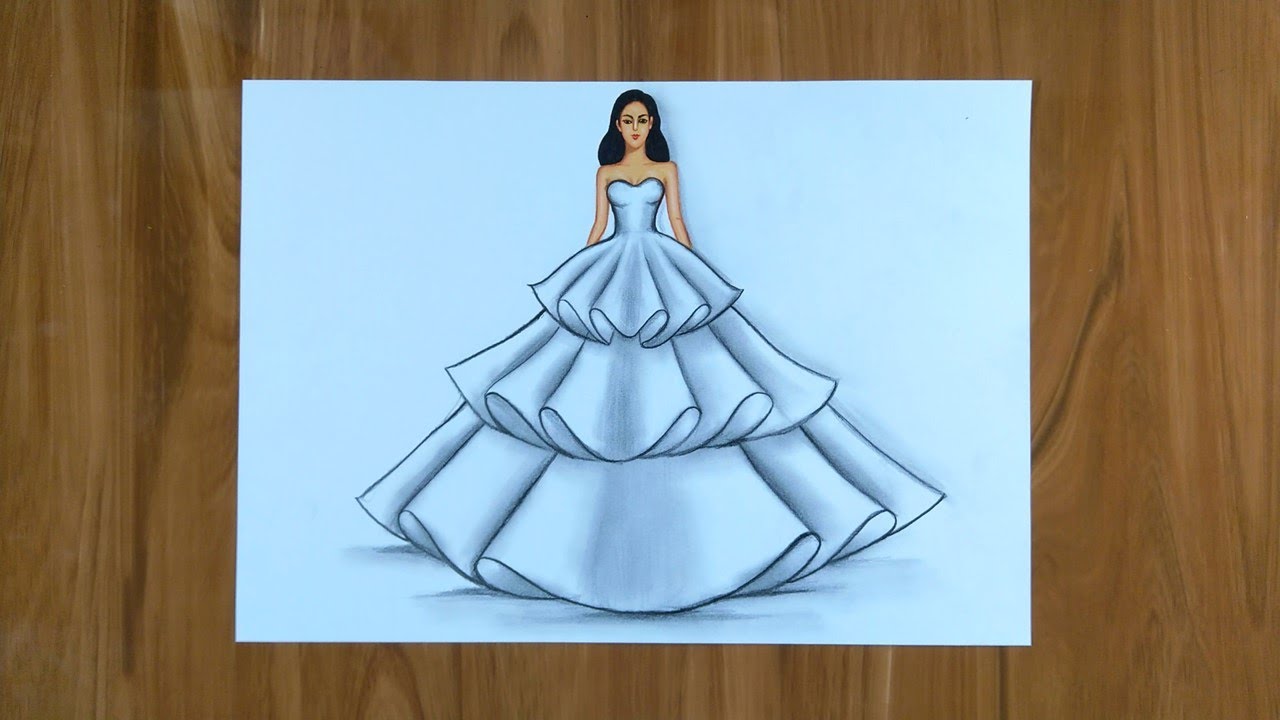
Fashion design sketches are rough, unfinished drawings of clothing, and how they’re intended to interact with the human body. Creating fashion drawings is an important part of the design process and a highly respected drawing style. These vibrant illustrations frequently show exaggerated, elongated forms that resemble models on the catwalk, with little-to-no facial features because clothes stay at the core. I sometimes wonder if art imitates real life or the other way around. Fashion design as a sketching style is especially prominent in the streetwear and hip-hop cultures, where fashion designers establish their own look. There is a lot of overlap when it comes to using fashion designs; they exist in Manga/Anime and Cartoon images.
Anamorphic / Anamorphosis Drawing Style

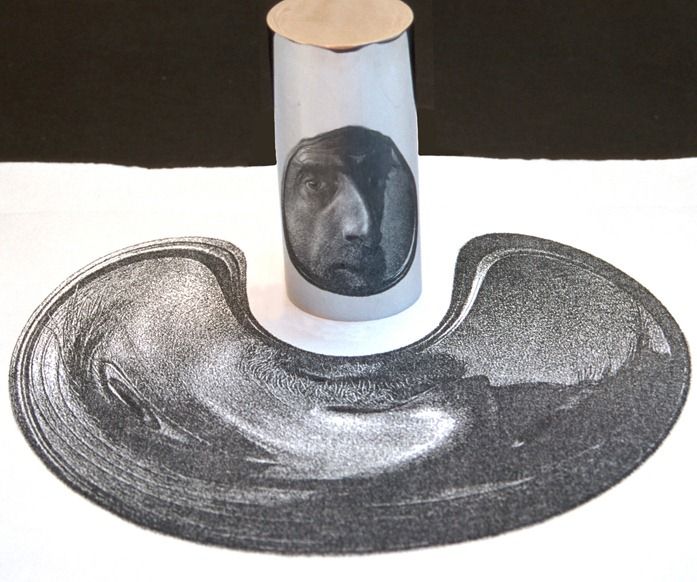
Anamorphic drawing, also known as anamorphosis, is an artistic technique using distorted imagery which can only be seen properly from a specific viewing angle or with the aid of optical devices like mirrored cylinders. To create an anamorphic drawing, the artist intentionally distorts a grid to map an image onto a surface. Viewers then have to find the correct angle or use a device to reconstruct the image. This style is a fun, eye-catching way to create interactive art.
Doodle Drawings

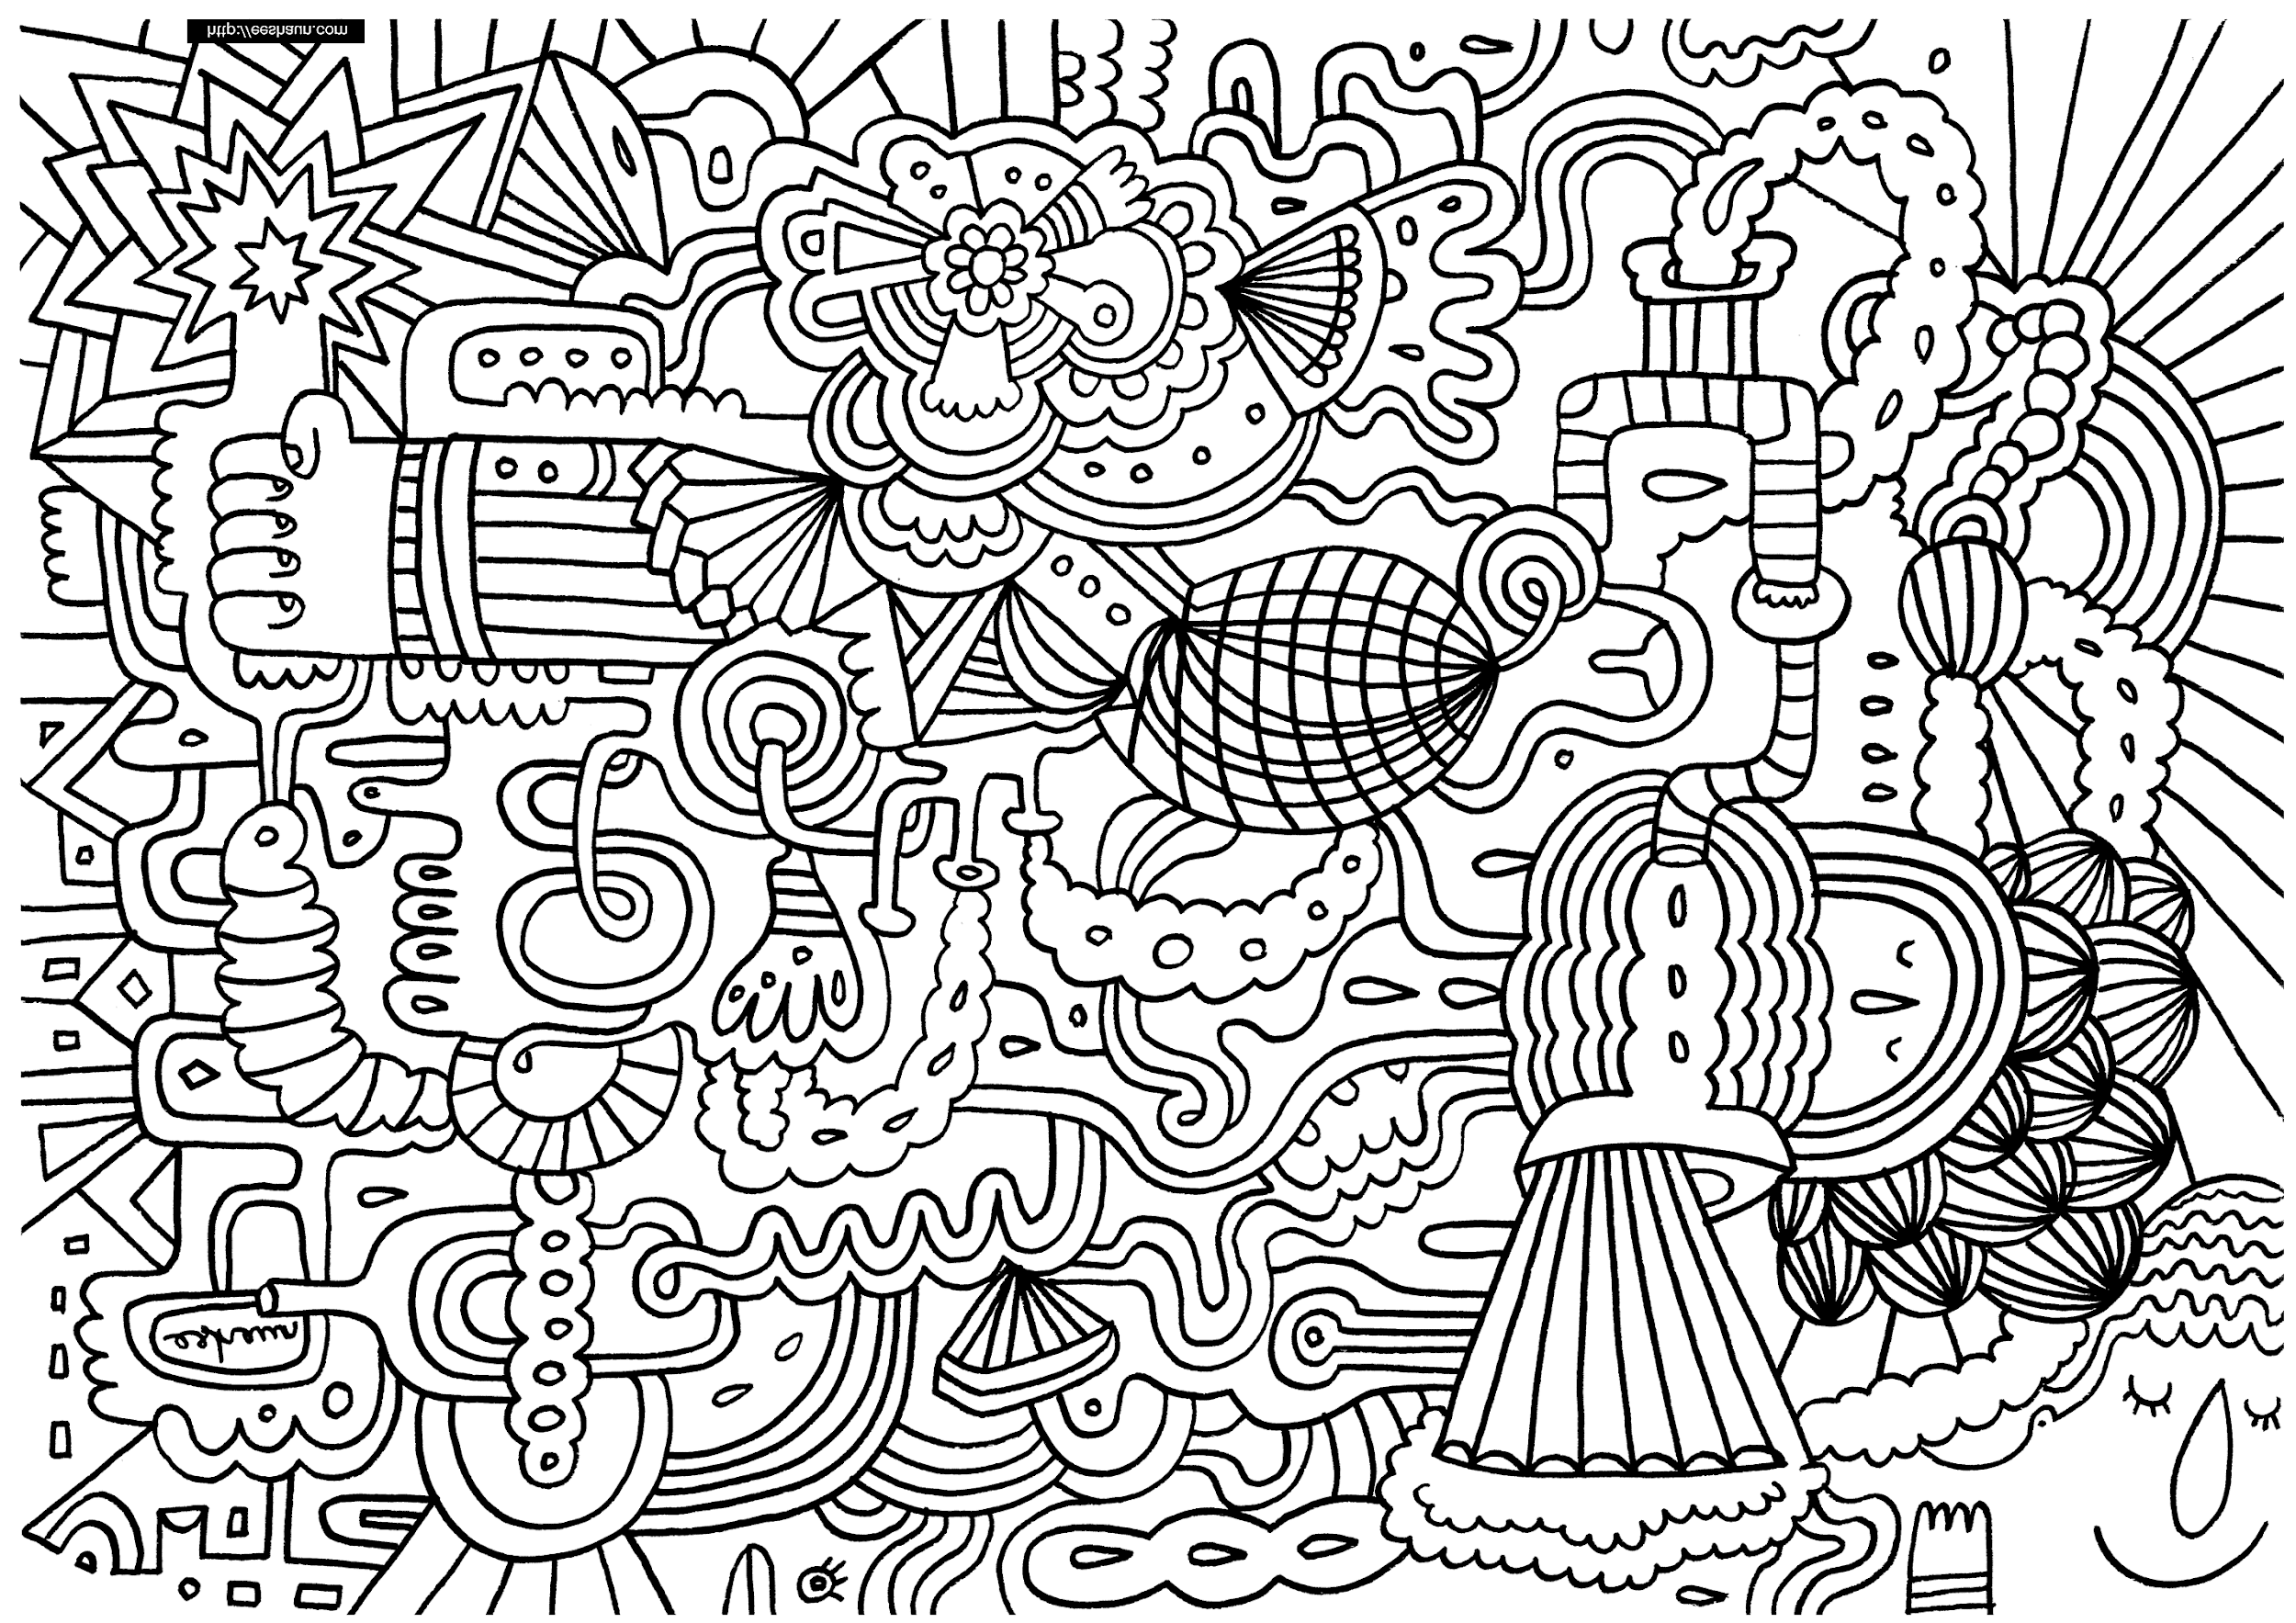
Doodle drawings are casual, spontaneous sketches. They allow you to let loose and create art without worrying about the outcome. To doodle, just grab some paper and a pen or pencil and start drawing whatever comes to mind. Doodling is a great way to tap into your creative side and relieve stress.
Some ideas for doodle drawings include:
- Random shapes: circles, squares, stars
- Zentangles: intricate patterns made of repetitive lines
- Cartoon characters
- Objects around you: phones, mugs, plants
- Abstract designs
The key to doodling is not to overthink it. Just start scribbling and see what appears on the page. Doodling should be fun and freeing. Don’t worry about the quality or outcome. The process of creating is what matters most.
Architectural Drawings

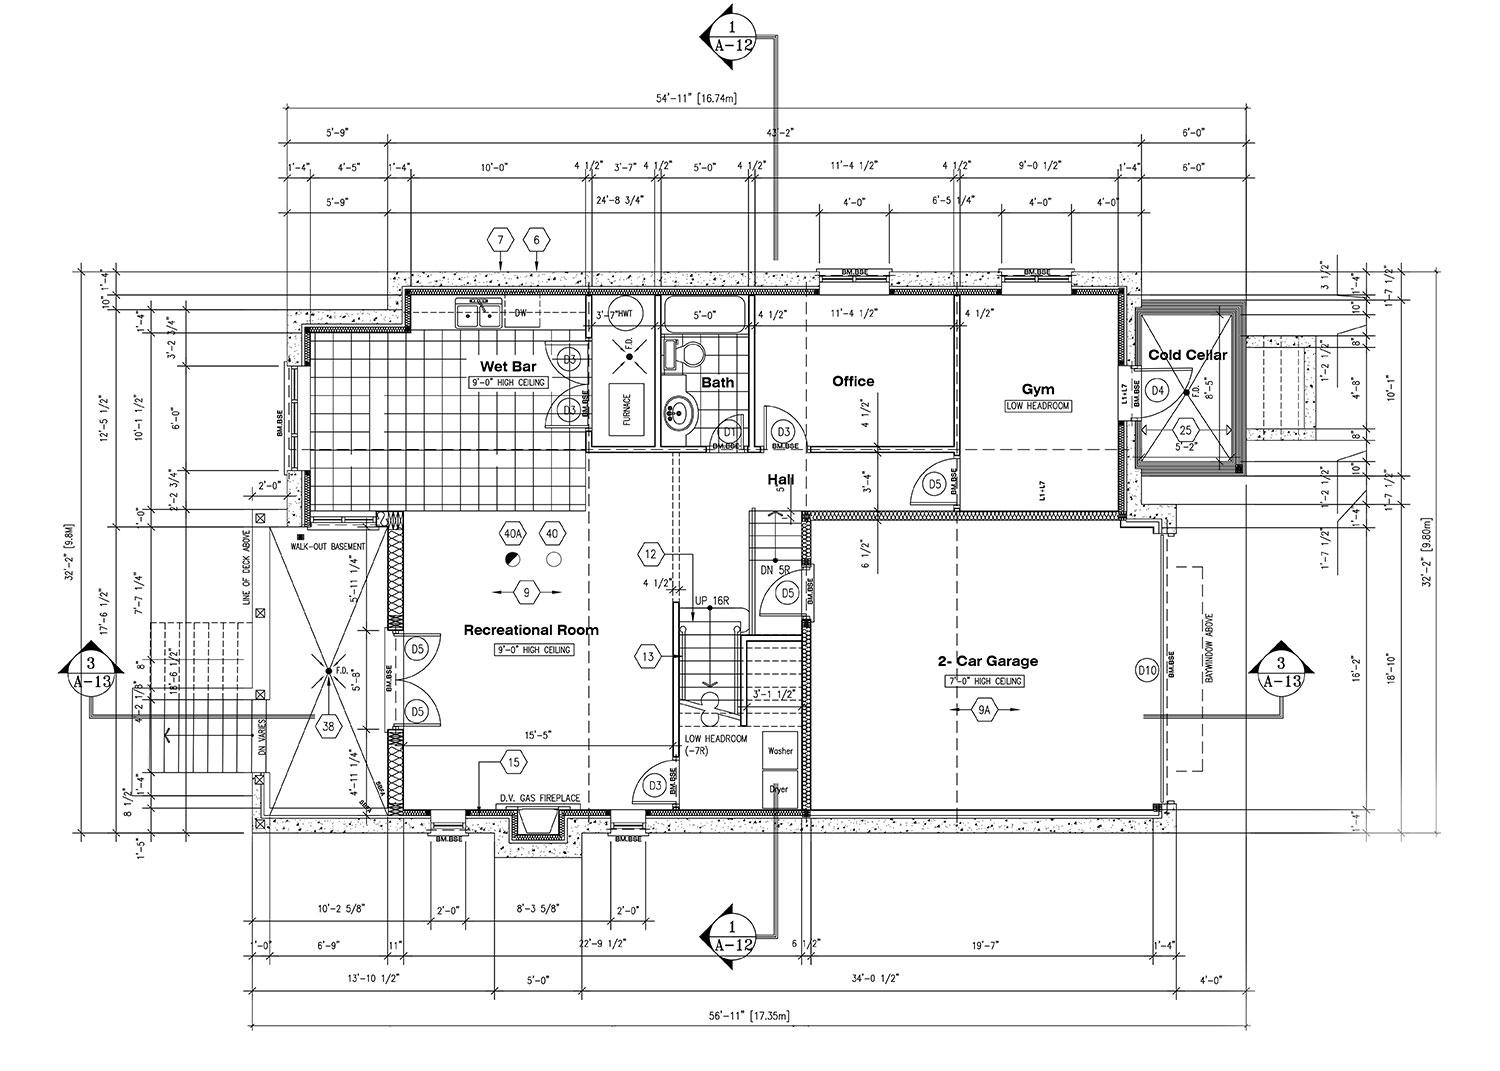
Architectural drawings aim to capture the details and specifications of a building. These types of drawings provide visual representations of the building’s design and plan. They include floor plans that show the layout of rooms, elevations that show the front, rear and side facades, and cross-sections that display the building’s vertical details.
Abstract drawing

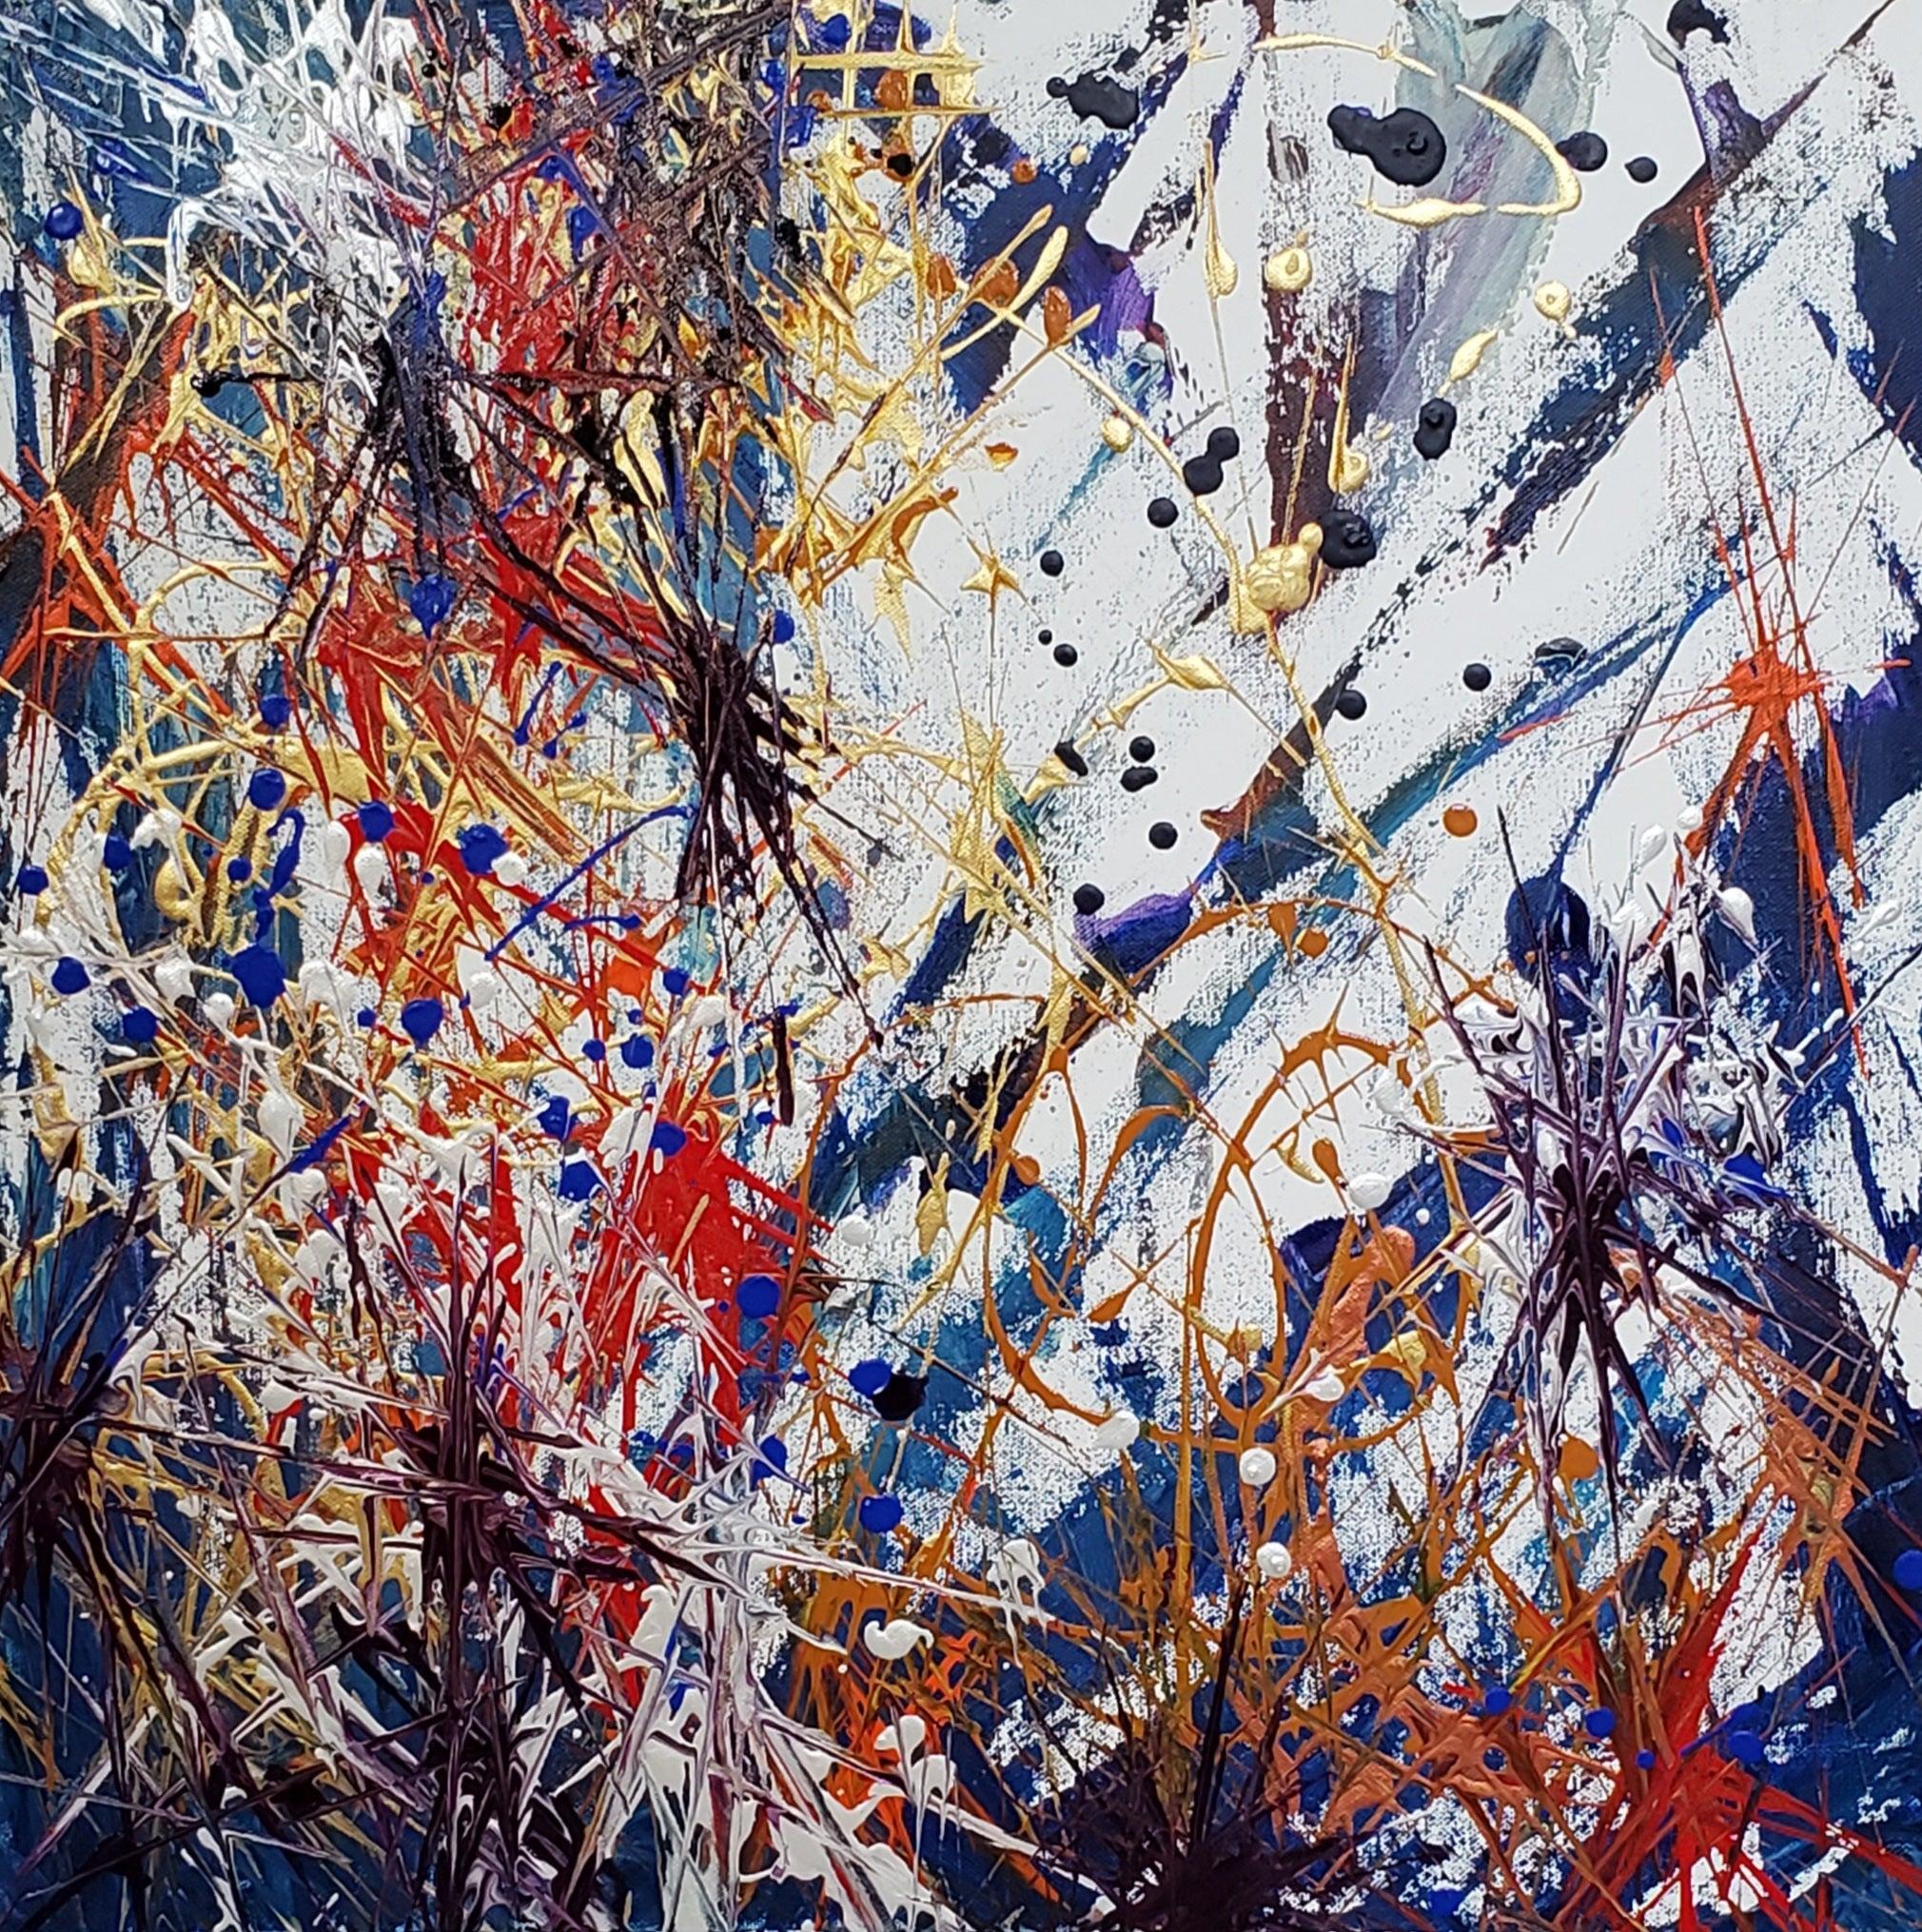
An abstract drawing is the freest type of drawing. It focuses on color, light, and form to create a work of art that does not represent reality. When doing an abstract drawing, forget about trying to create a realistic representation. Instead, let your imagination run free. Play with shape, line, color, and pattern. Start with basic shapes like circles, squares or triangles and see what happens when you overlap or intersect them.Use vibrant colors in unusual combinations. Create texture with dots, dashes, and scribbles. There are no rules in abstract art, so have fun and experiment!
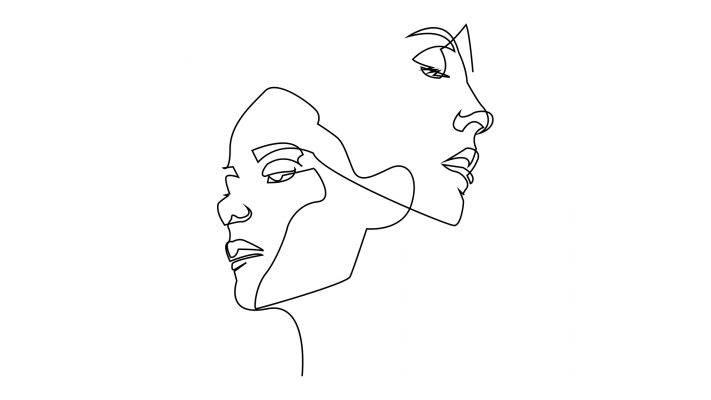
Line Drawing

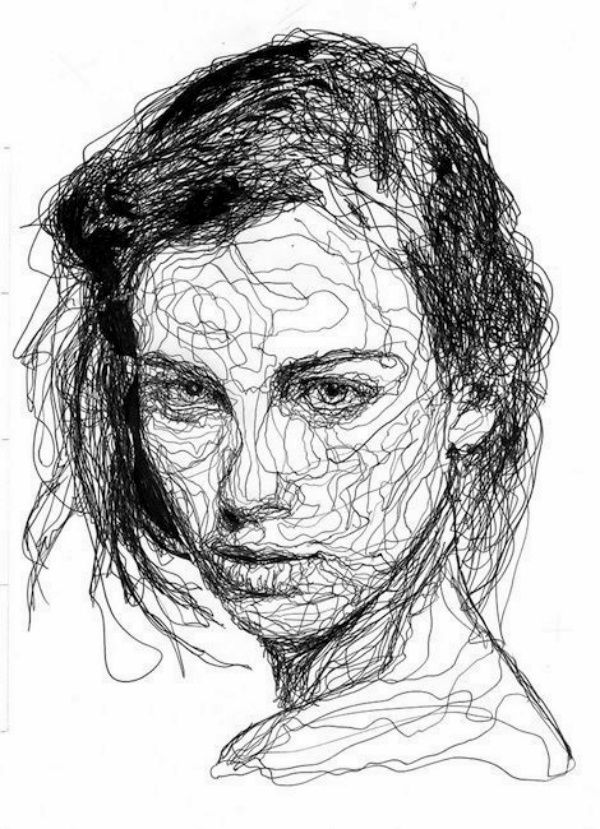
Line drawing is the most fundamental of all drawing styles. As the name suggests, it solely focuses on lines to create form and depth. To do a line drawing:
Start with basic shapes like circles, squares and triangles. Connect these shapes using straight or curved lines to create the outline of your subject. Keep your lines light and loose. Don’t worry about shading or details yet.
Once you have the overall outline in place, start adding contour lines to create depth and volume. Contour lines follow the form of the subject, emphasizing curves and edges. Add cross-contour lines that cut across the form. Place lines close together in areas of detail or shadow. Leave more space in areas of highlight.
Use varying line widths to create emphasis. Thicker lines attract more attention and can be used for outlines. Thinner lines work well for details and cross contours. A mix of line widths makes for an interesting drawing.
Erase any unnecessary or distracting lines. Refine and clean up your drawing. Add final details like facial features or patterns. Your line drawing is now complete! With practice, you’ll be creating line drawings with depth, realism and artistic flair.
Pointillism Drawings

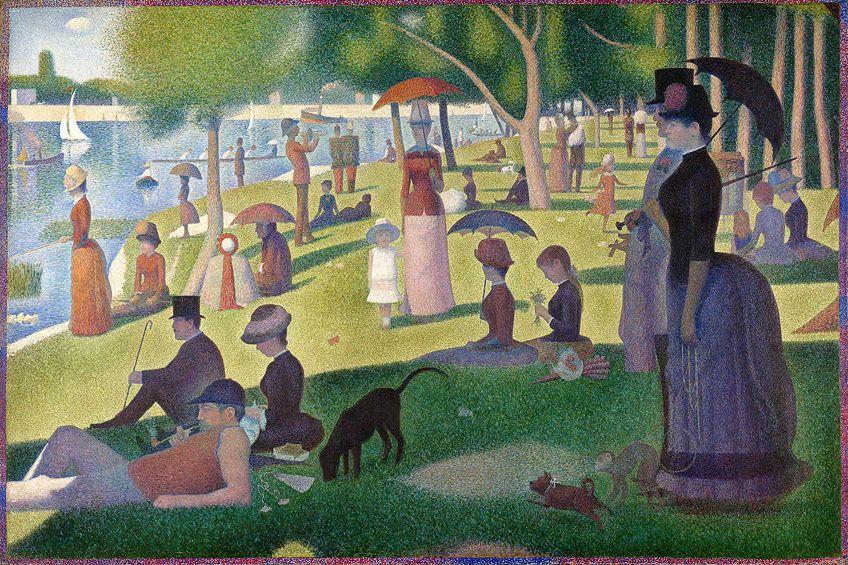
Pointillism is a style where small dots of unmixed color are applied in patterns to form an image. To achieve a pointillism drawing, use a sharp pencil, pen or stylus to place tiny dots of color onto the page. The dots are placed close enough together that the eye blends them into shapes and forms. By applying dots of pure color, more vibrant and intense shades can be achieved than by mixing colors on a palette.
For your first attempt at pointillism, start with basic subjects like spheres, cubes or pyramids. Dots should be evenly spaced and the same size. Work slowly, paying attention to shading and form. Once you get the hang of it, you can move on to more complex subjects. The key is patience – placing each dot carefully to build up layers of color and create depth and details.
Pointillism is a mesmerizing art form that encourages mindfulness. Giving it a try can lead to surprising results and a newfound appreciation for the details in the world around you.
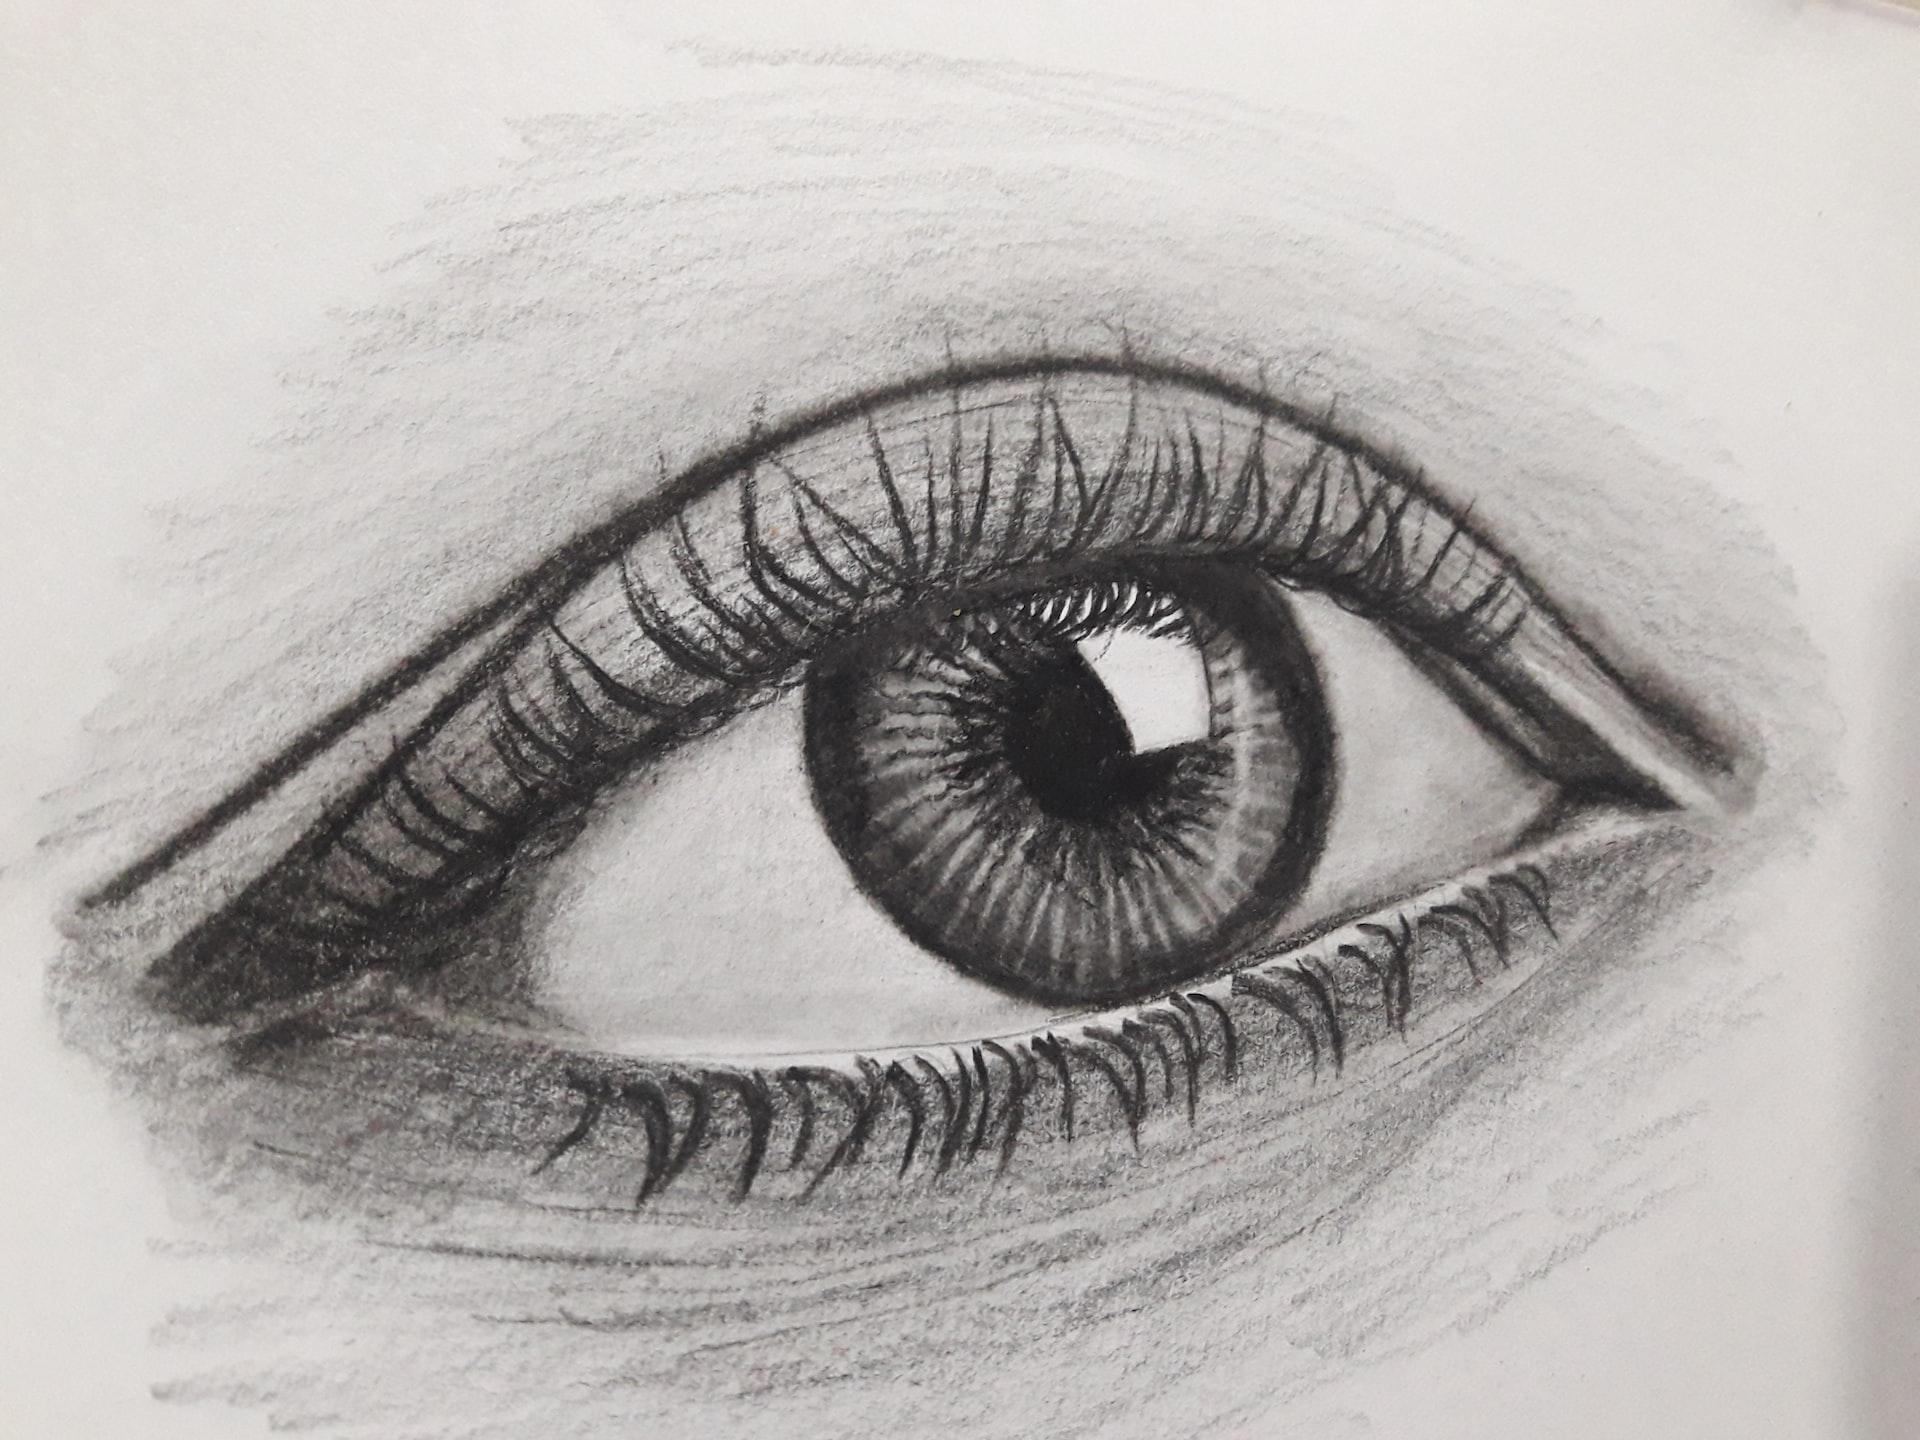
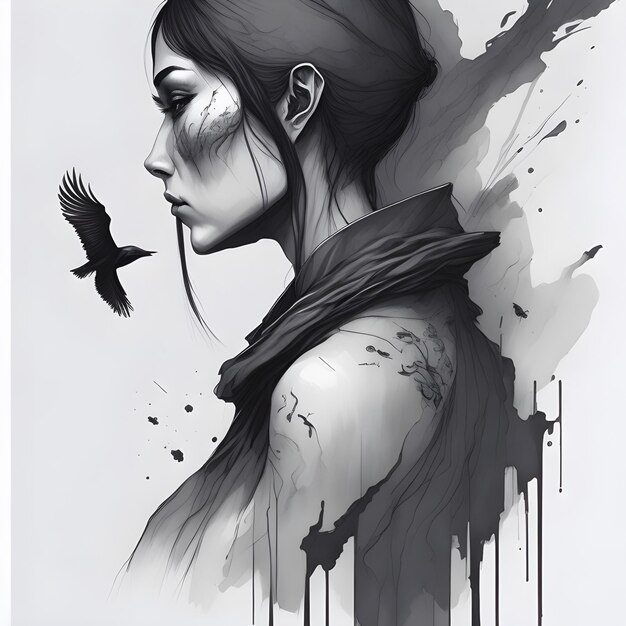
Photorealism / Hyperrealism Drawings


Photorealism, also known as hyperrealism, is an artistic technique that aims to make a painting or drawing look like a high-resolution photograph. As an artist, you painstakingly recreate precise details to achieve a photorealistic effect. This style of art rose to prominence in the 1960s and 70s.
To create a photorealistic work of art, use visual tools like graphite pencils, paints, or digital software to reproduce a reference photo down to the smallest details. Carefully observe things like shadows, highlights, proportions and textures. Add layers of color or shading gradually until your work resembles a vivid snapshot of reality.
Some well-known photorealistic artists include Chuck Close, Audrey Flack, and Richard Estes. Their paintings showcase mundane scenes in painstaking detail. At first glance, you may not even realize you’re looking at a painting. Photorealism blurs the line between reality and handmade art.
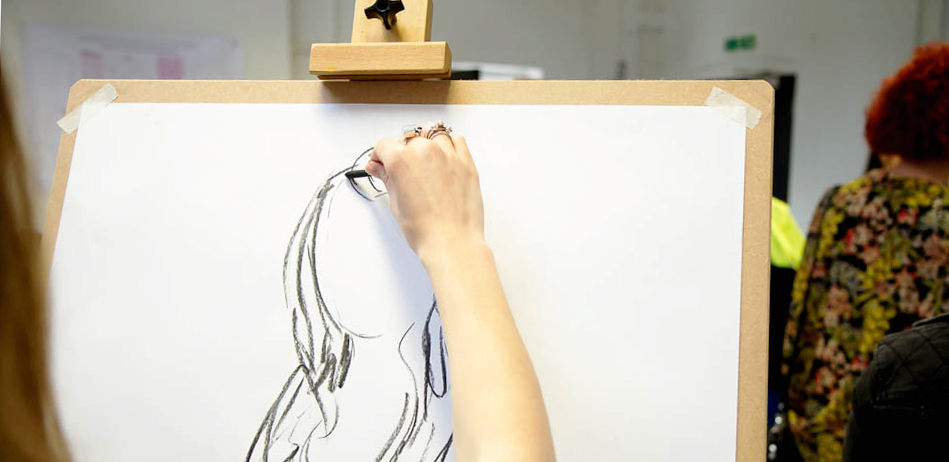
Traditional Sketching


Traditional sketching, also known as freehand sketching, is one of the most fundamental drawing techniques. To start sketching, grab a pencil, eraser, and a sketchpad. Focus on the basic shapes that make up your subject – circles, squares, triangles. Sketch lightly at first, then slowly add details and darken lines.
Shading and crosshatching can enhance your sketch and add depth. Sketching on a regular basis will help improve your skills and develop your own unique style. Once you get comfortable, you can move on to different mediums like charcoal, pen and ink, or watercolor.
Etching

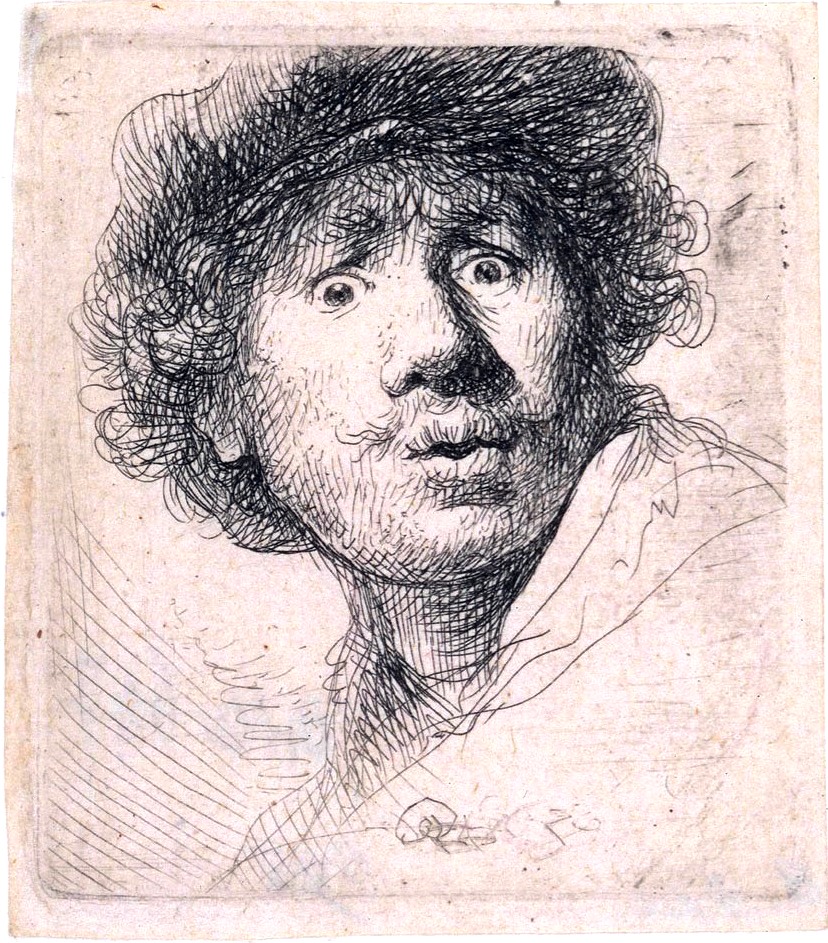
Etching is a printing technique where a metal plate is engraved with an acid to create recessed lines. The plate is first coated with an acid-resistant wax called a “ground”. The artist scratches through the ground with a sharp tool to expose the metal underneath. When the plate is submerged in acid, the acid eats into the exposed metal, creating grooves.
The ground is then removed, ink is applied to the plate, filling the grooves. A piece of paper is placed over the plate and pressure is applied to transfer the ink onto the paper. The result is a print with beautiful, velvety lines. Etching allows artists to create very fine, expressive lines that can resemble pencil or charcoal drawings.
Some famous artists known for their etchings include Rembrandt and Goya. Rembrandt, in particular, is renowned for his masterful use of etching to create dramatic shadows and contrasts. If you want to experiment with etching, all you need is a metal plate (copper or zinc), etching tools, acid, ink, and a printing press. With some practice, you’ll be creating intricate etchings in no time!
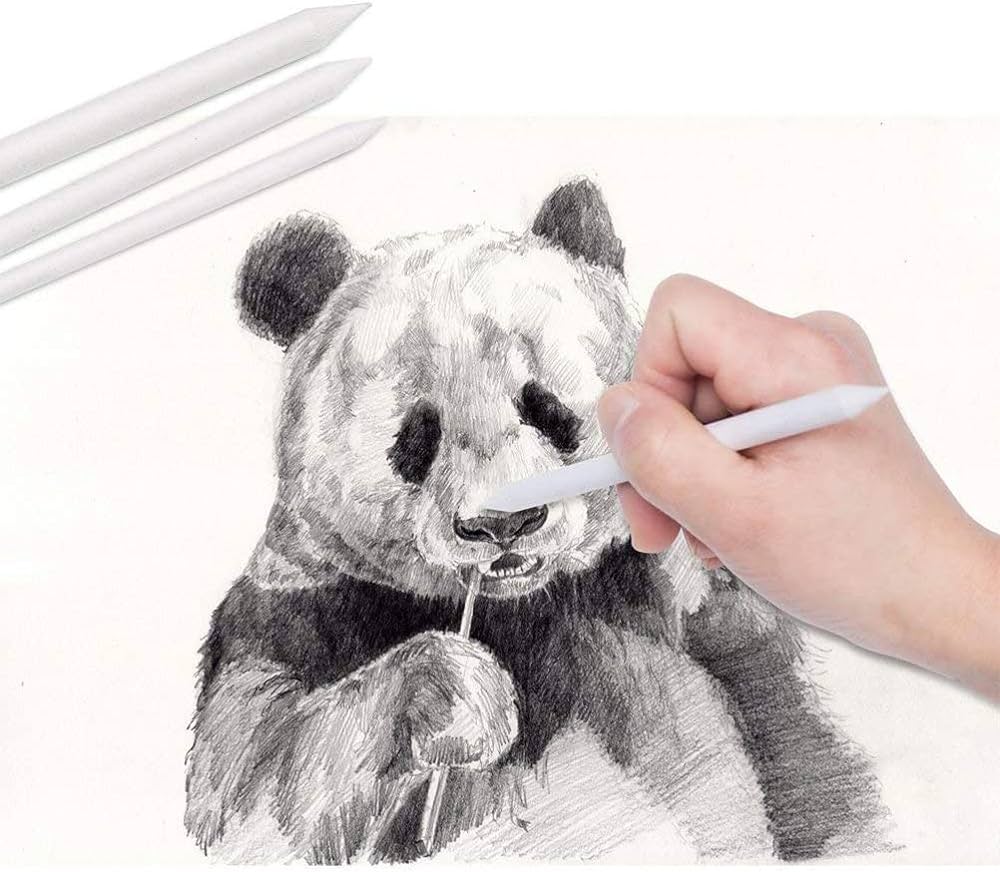
Charcoal drawing

Charcoal drawing is a fun and expressive medium. To get started, you’ll need some basic supplies: charcoal sticks or pencils, sketchpad, eraser, blending tools like tortillions.
Charcoal comes in different hardness levels, from soft to hard. Softer charcoals, like 6B, are darker and more blendable. Harder charcoals, like 6H, are lighter and better for details.Experiment with different hardnesses to achieve a range of tones.
Make light, loose sketches to start, then slowly build up layers of shading and blending. Use your finger, tortillions, or a paper stump to smooth and blend. Create highlights by erasing or lightening areas. Charcoal is a messy medium, so use a spray fixative as you work to prevent smudging. You can also dip your fingers in isopropyl alcohol while blending for easier manipulation.
With practice, you’ll be creating expressive masterpieces in charcoal. Let your creativity flow and have fun with it! The texture and depth you can achieve is unparalleled.
Contour drawing

Contour drawing involves the slow, careful sketching of the edges and outlines of a subject. As your eye follows the contours of the form, your hand slowly traces the lines on the paper. Focus on the overall shape and proportions of the form instead of small details.
The keys to successful contour drawing are:
- Go slowly. Take your time to study the contours and translate what you see onto the page.
- Keep your eyes on the subject, not the paper. Glance at your paper only briefly to check your positioning.
- Use a continuous line. Do not lift your drawing tool from the page. This helps capture the flow and rhythm of the form.
- Draw what you see, not what you know. Avoid making assumptions about the contours and shapes.
- Consider the proportions and relationships between forms. Capture the proper angles, distances and sizing of parts to each other.
Contour drawing is a great way to train your hand-eye coordination and develop an understanding of forms and proportions. With regular practice, you’ll gain confidence in your ability to capture a likeness and bring subjects to life on the page.
Cross-hatching

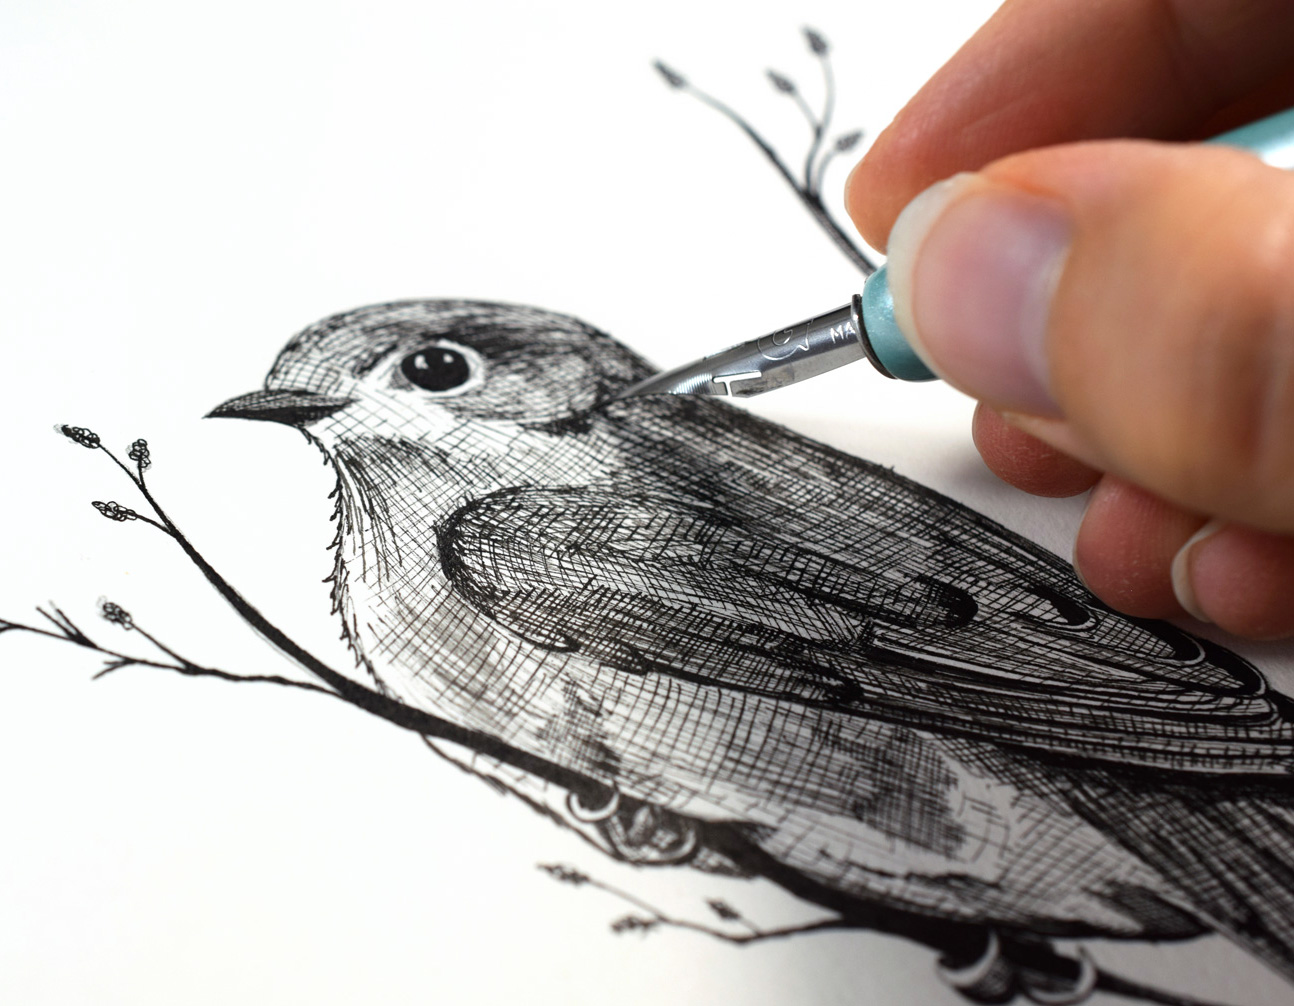
Cross-hatching is a shading technique where you draw a series of parallel lines that intersect each other. The closer and darker the lines are, the darker the tone. Think of it like a woven fabric the tighter the weave, the less light passes through.
To start cross-hatching, make a series of parallel lines. Then add another series of lines at an angle that intersect the first set. Continue adding more lines, varying the angle and proximity for different tones. Closer, darker lines will produce darker areas, while lighter, more spaced out lines create highlights. You can use cross-hatching in your drawings to show form, depth, and shadow. Practice varying the weight, spacing, and angle of your lines to achieve a full range of tones from light to dark.
Cross-hatching takes practice to master but is a fundamental shading skill for any artist. Once you get the hang of it, you’ll be hatching like a pro in no time!
Digital drawing

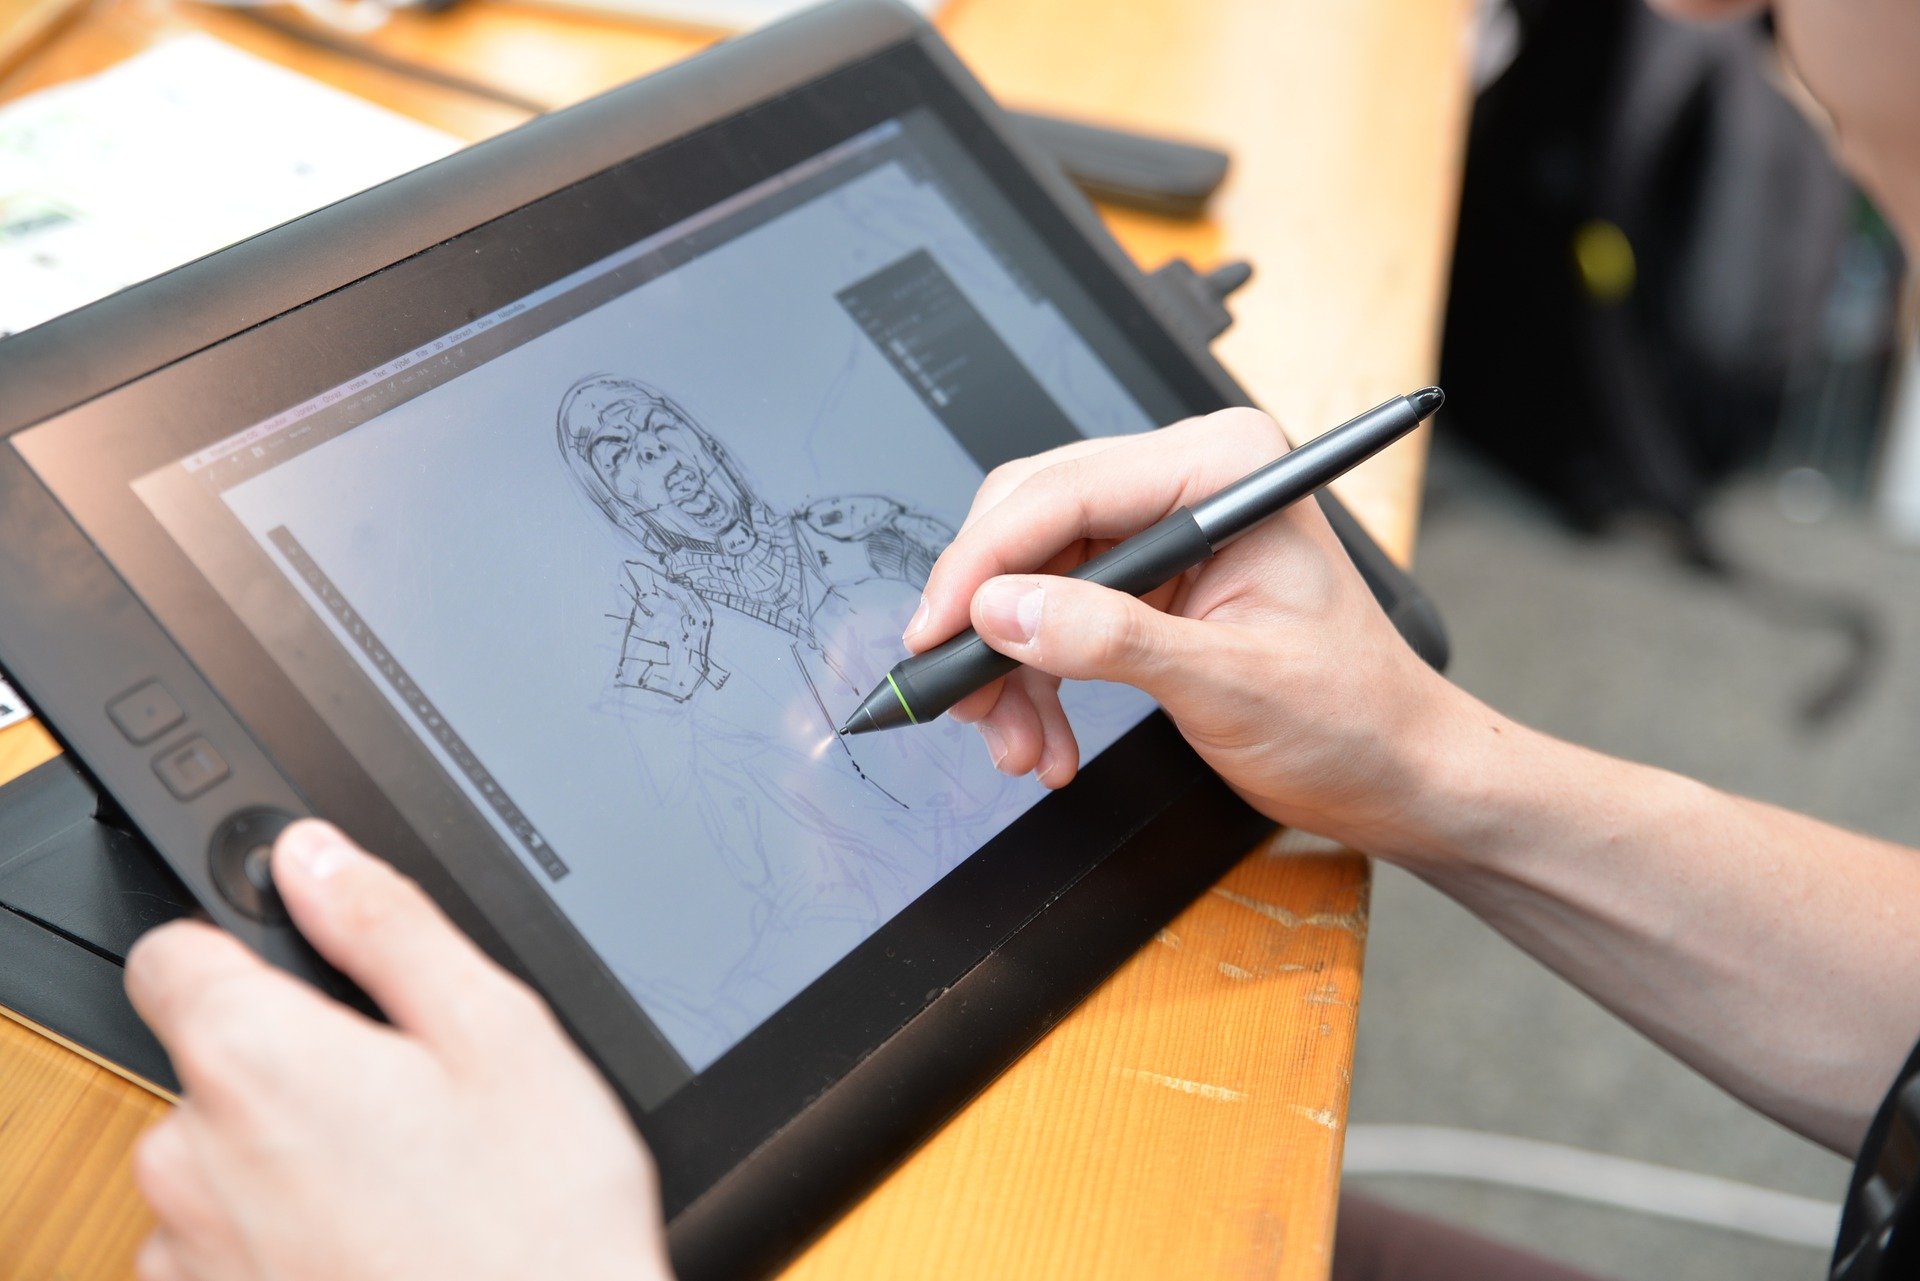
Digital drawing utilizes computer software and input tools like a mouse, stylus, or touchscreen to create drawings. With the right tools, drawing digitally can feel intuitive and natural. Many digital artists use graphics tablets with a stylus to draw directly on the screen. Popular software for digital drawing includes:
- Photoshop: The industry standard for image editing and design. It provides tools for sketching, painting, and illustration.
- Illustrator: Also from Adobe, focused on vector graphics, ideal for logos, fonts, and clip art.
- Procreate: An iPad app great for sketching, drawing, and painting. It’s affordable but packed with features.
- Corel Painter: Simulates traditional media with realistic brushes and color blending. Great for a natural feel.
The biggest benefit of digital drawing is having a wide range of tools at your fingertips to create different effects. You can easily undo mistakes, zoom in and out, and create layers to build up details. However, it does require an initial investment in hardware and software, and it lacks the tactile experience of traditional drawing. For many artists, a combination of both digital and traditional techniques offers the most creative flexibility.
Ink drawing

Ink drawing is a technique where you use ink to create lines on paper. The most common tools for ink drawing are pens with nibs that come in a variety of widths, from ultra fine to broad. You can achieve a range of artistic effects using different nibs.
To start ink drawing, first do some practice sketches with a pencil. Once you have your sketch mapped out, go over the lines with pen and ink. Take your time, as ink is permanent. Consider using rulers or French curves for straight lines and circles. For shading, use hatching, crosshatching, stippling, or washing techniques.
Experiment with different types of ink like India ink, drawing ink, or fountain pen ink. India ink provides solid black lines while fountain pen ink offers more flexibility. Combine inks for unique effects. Add color to your ink drawings using watercolor washes or colored inks.
The key to mastering ink drawing is practice. Focus on line quality, value, and composition. Sketch freely and have fun exploring all the creative possibilities of this dynamic medium.
Life drawing

Life drawing focuses on drawing the human figure from observation of a live model. As an artist, this style helps you gain an understanding of the structure, proportions, and anatomy of the human body.
To start, you’ll need basic supplies like paper, pencils, erasers, and a model. Begin with quick gesture drawings, focusing on the overall shape and posture. Then move on to longer poses, now adding details. Pay attention to proportions and angles as you sketch the model’s figure. Measure key points like the head to determine the number of ‘heads’ in the body’s height.
Life drawing helps build essential skills for any artist. You’ll get better at simplifying complex forms, capturing subtle details, and understanding how the body’s shapes interact with light and shadow. With regular practice, you can master this fundamental style of realistic drawing.
The possibilities are endless. Why limit yourself to one way of drawing when you can try many? Experiment with different styles and subjects to expand your skills as an artist. Most importantly, draw in the way that feels most natural and enjoyable for you.
Conclusion
And there you have it, 25 different types of drawing styles to try your hand at if you’re an artist looking to expand your skills! From realistic to abstract, architectural to cartoon, there’s something here for every creative mood and inspiration. Don’t be afraid to experiment with new styles outside your comfort zone. You never know when you’ll stumble upon a new favorite technique. The most important thing is to keep challenging yourself and having fun with the artistic process.